As we all know, the Bearables are quite possibly the cutest thing this side of kittens and fluffy baby pandas on slides. With the weather closing in, it's time to get accessorising these little beasties with one of your Maker super-powers and well-known post-apocalyptic life skill, KNITTING!
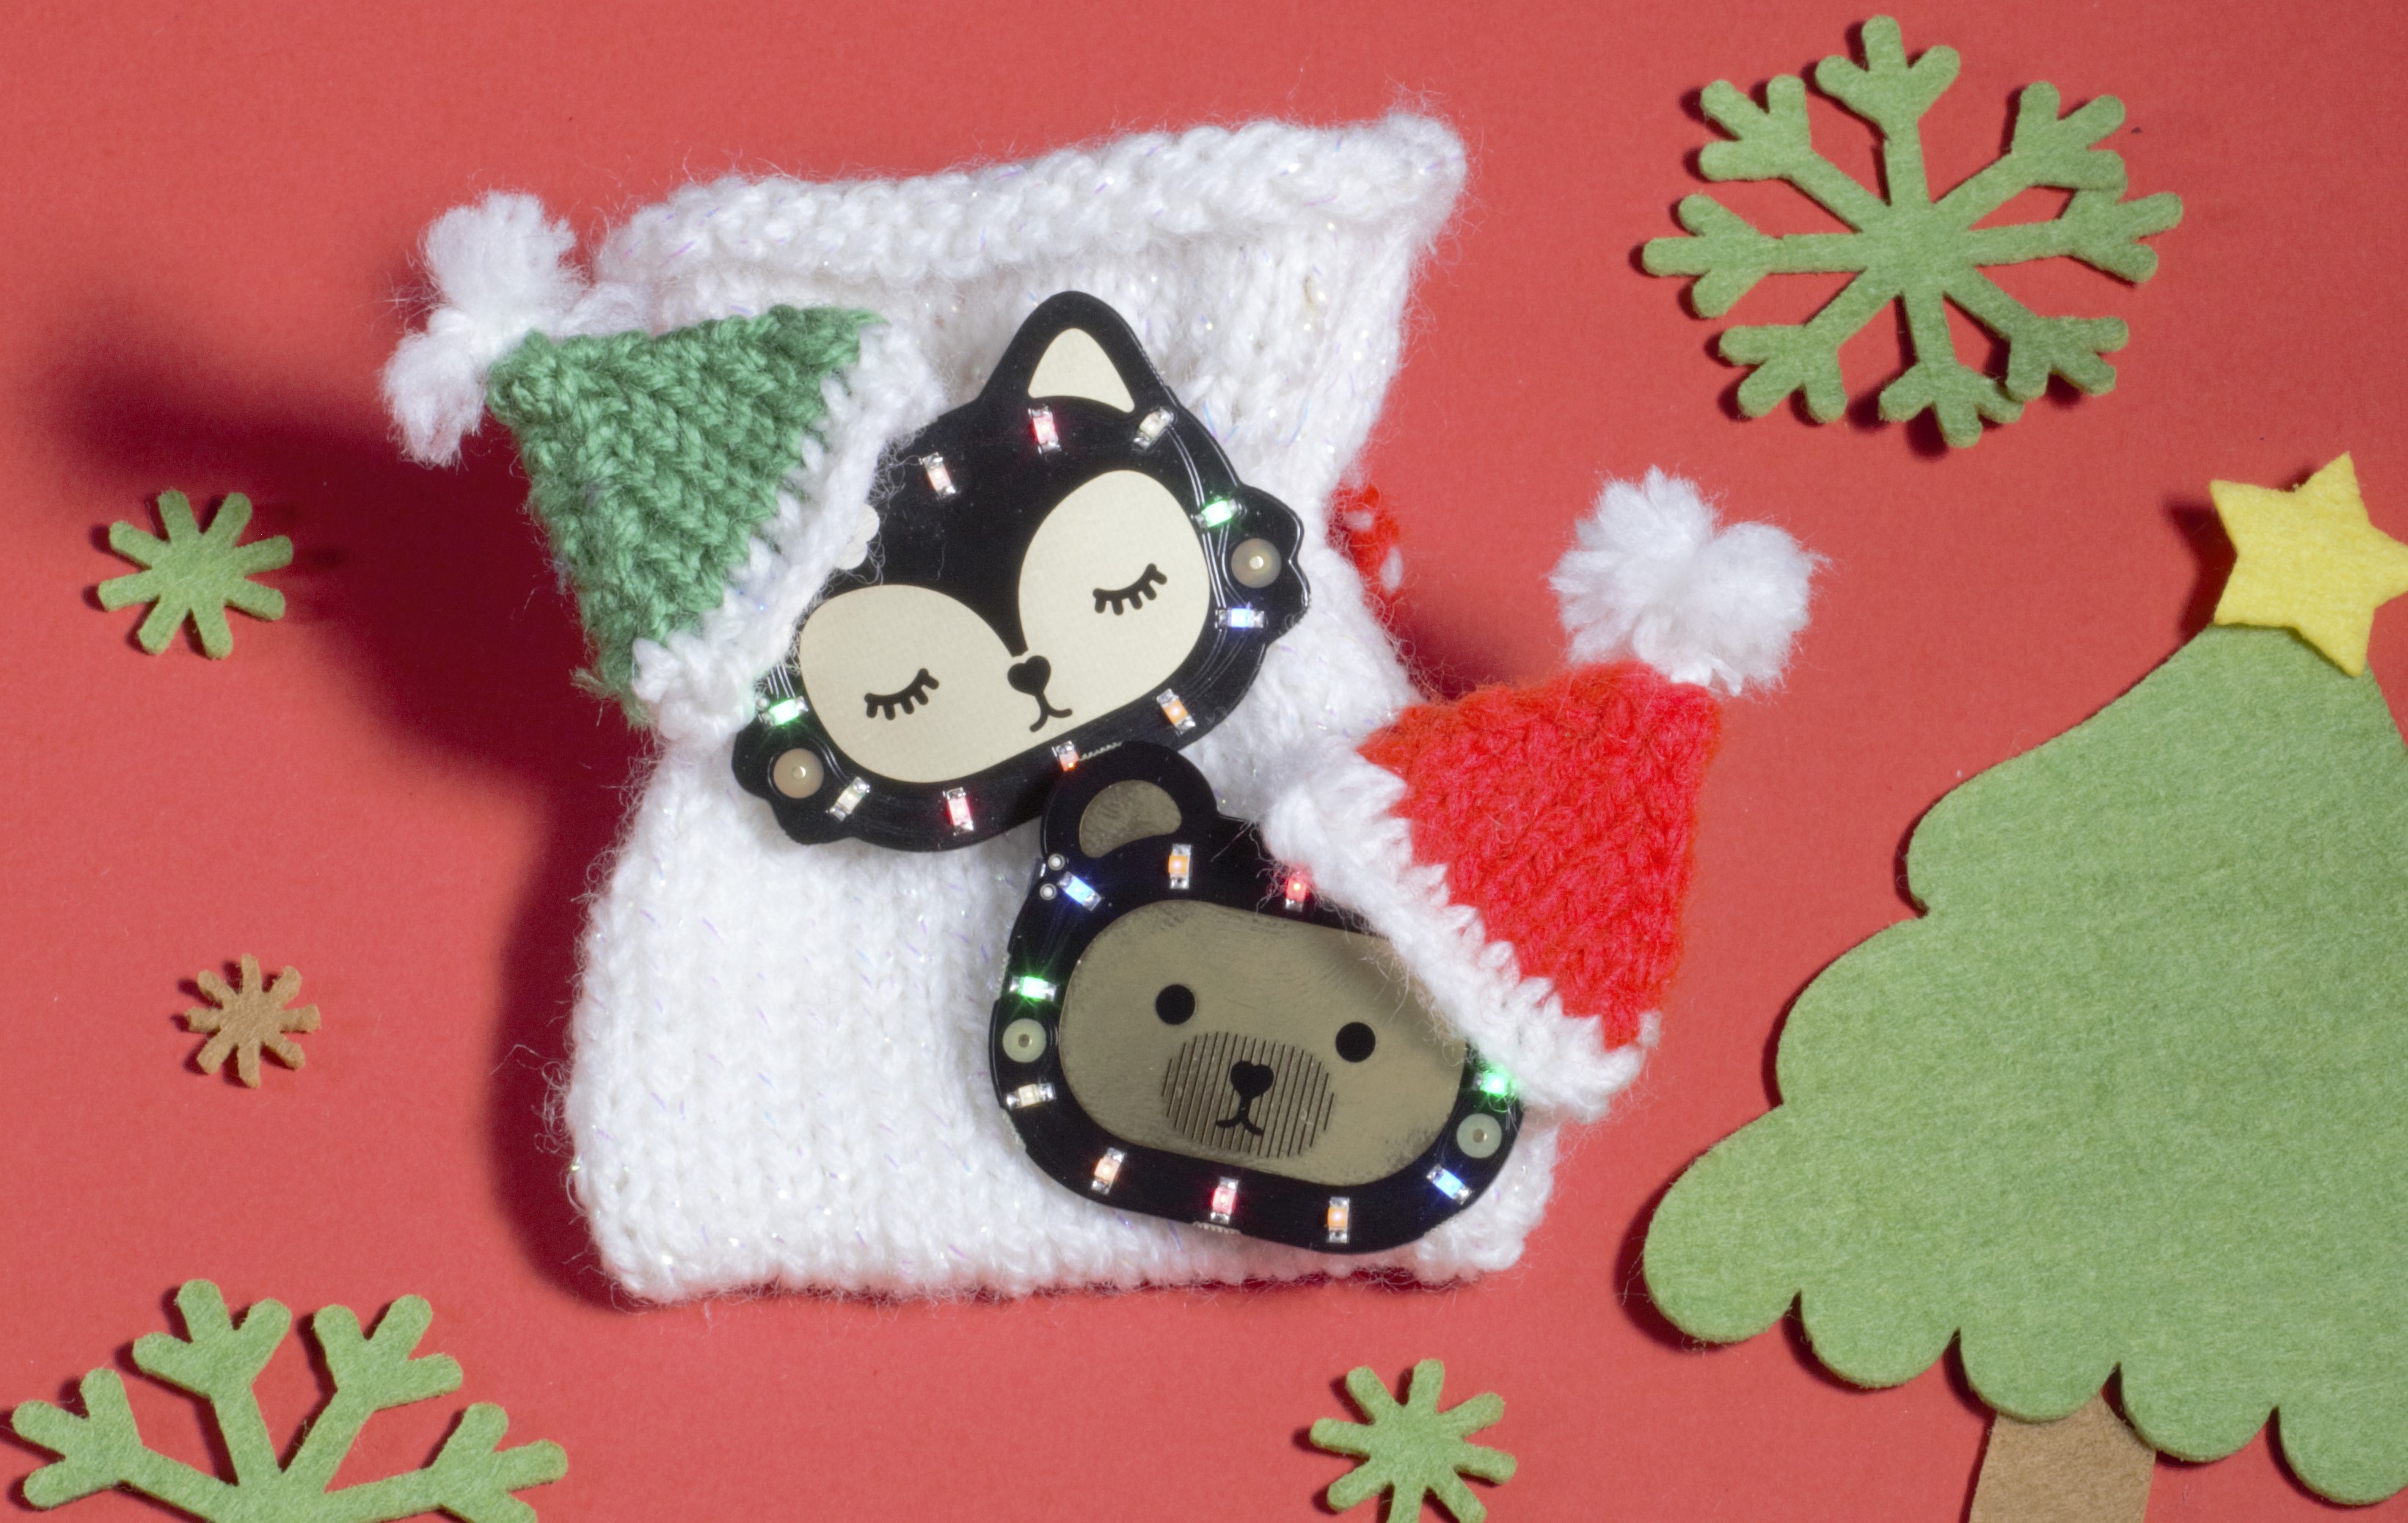
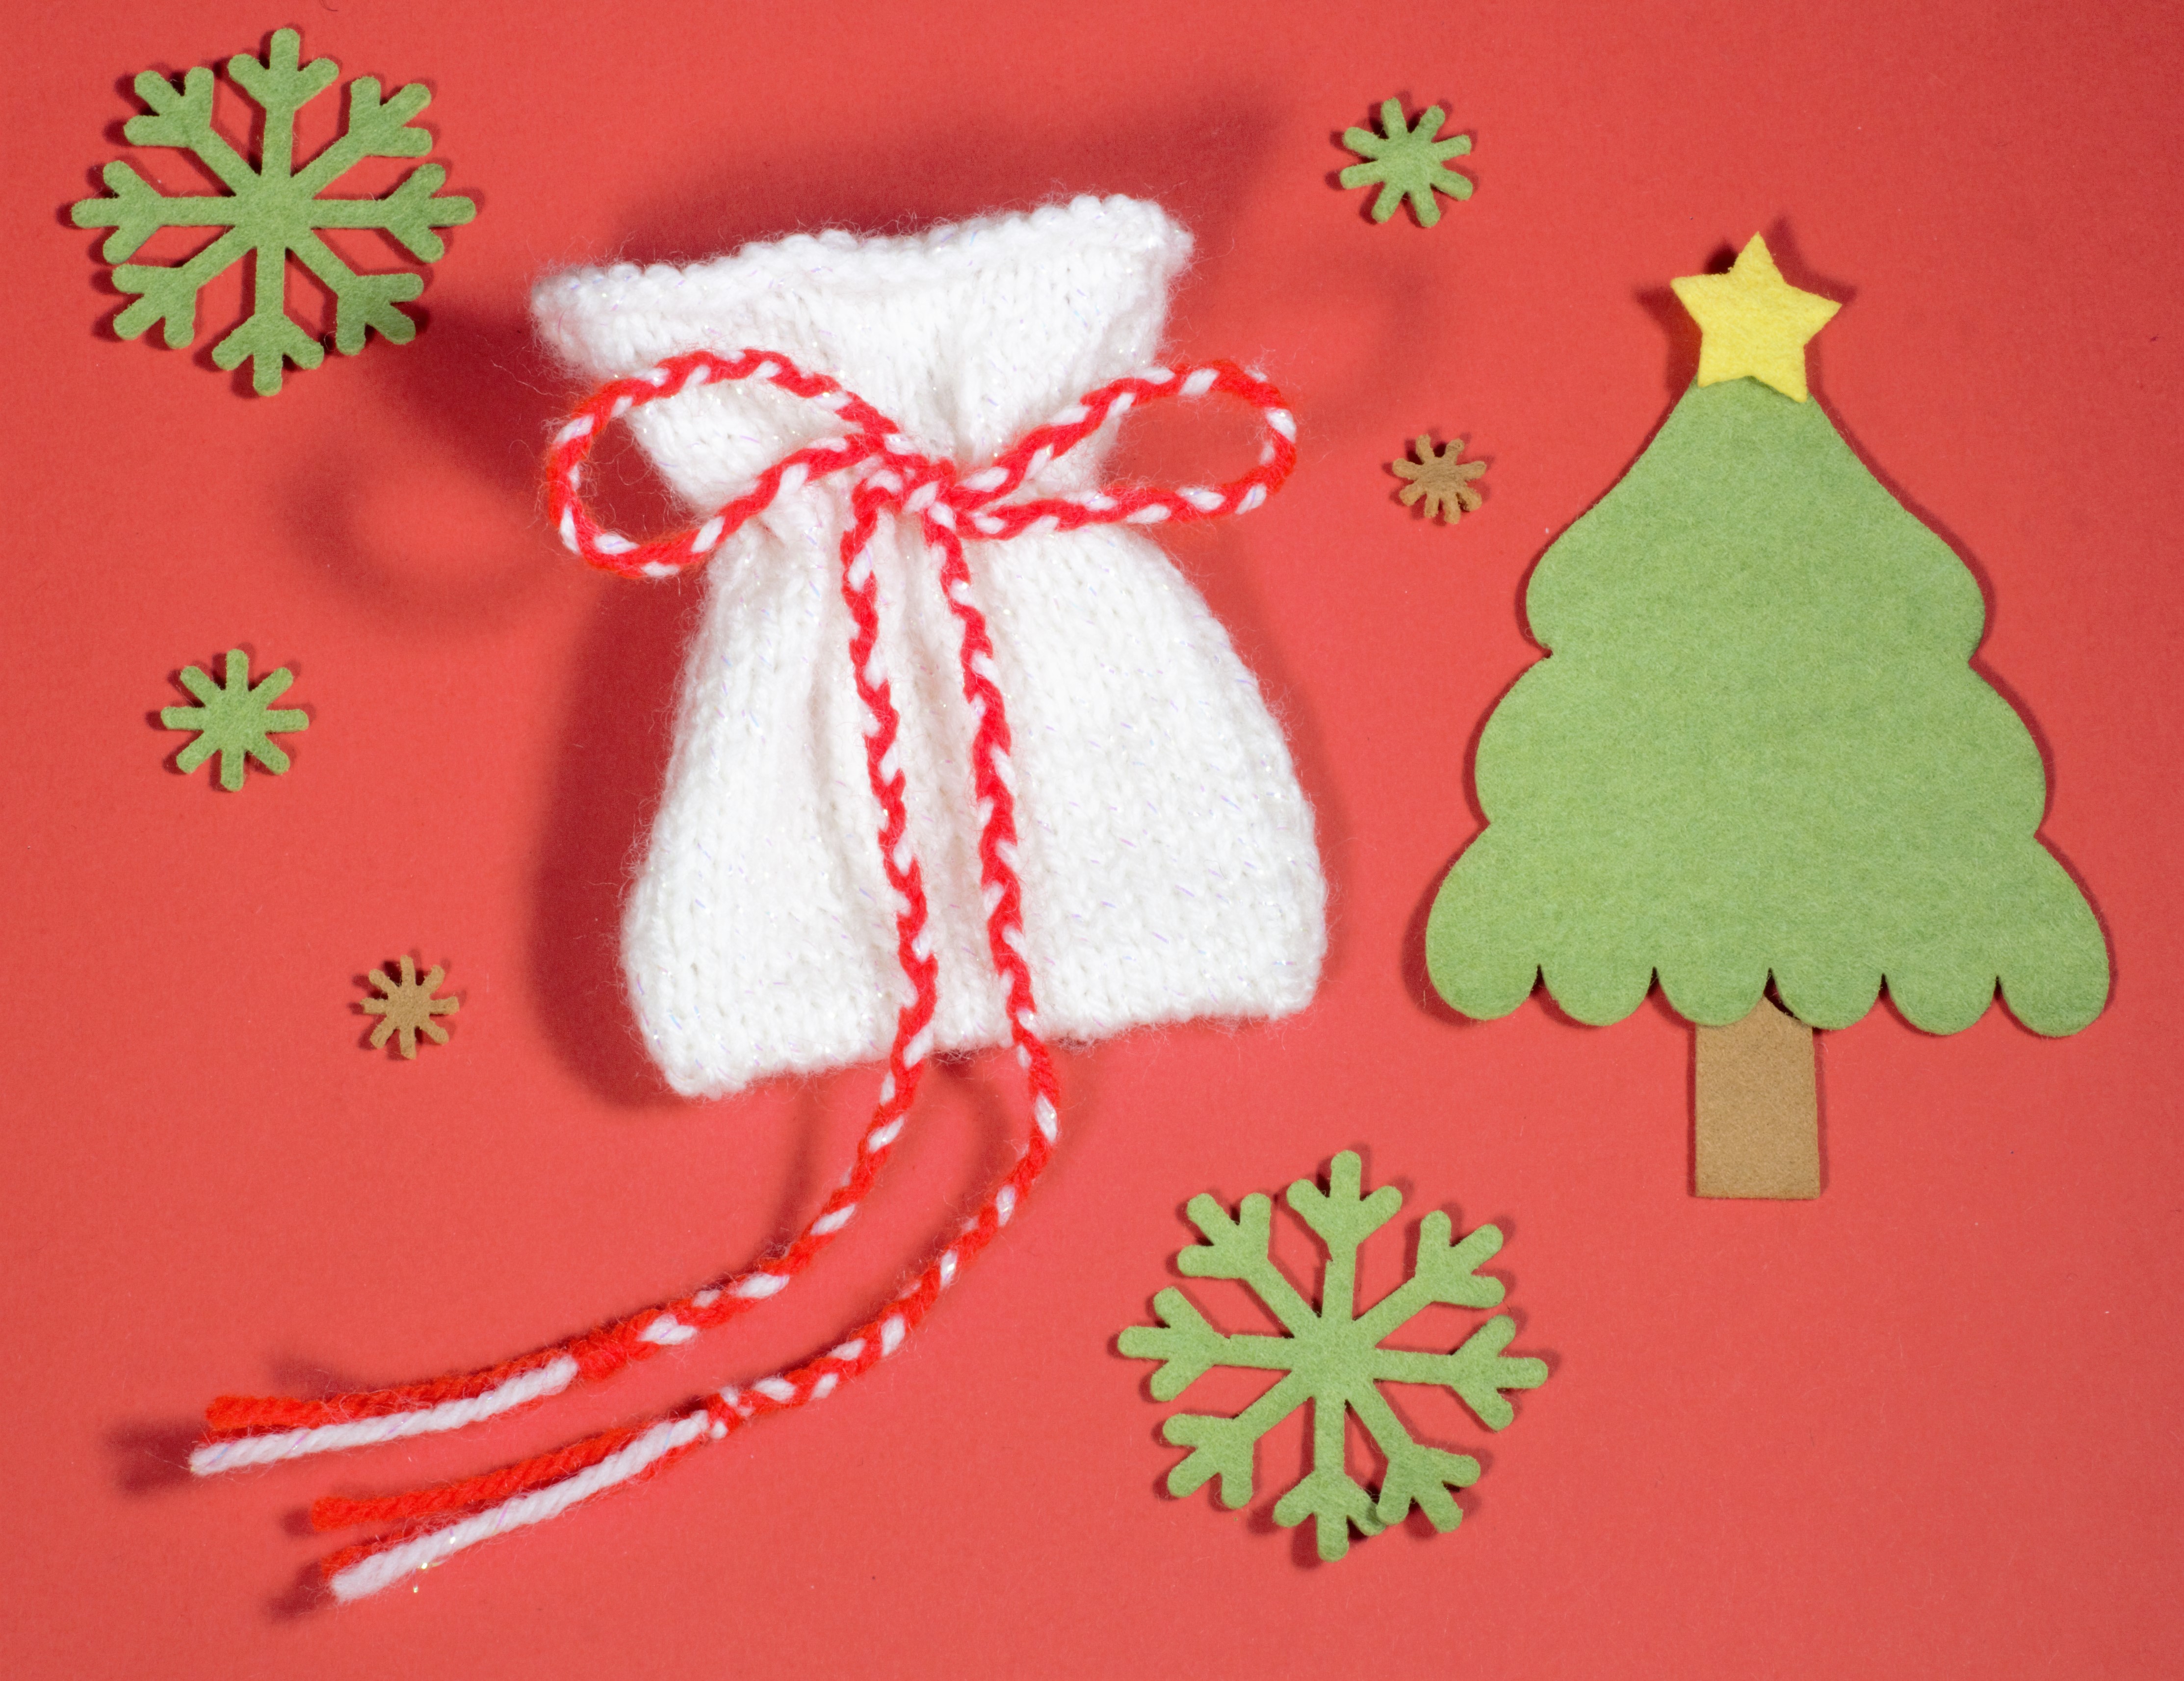
Kelly in our postroom is a genius not only with parcels, but also two sticks and some yarn, and she's written these bijoux patterns for you to use. One is for a little hat that fits both Bearable badges, and the other is for a drawstring gift bag to make festive gift-giving even more awesome.
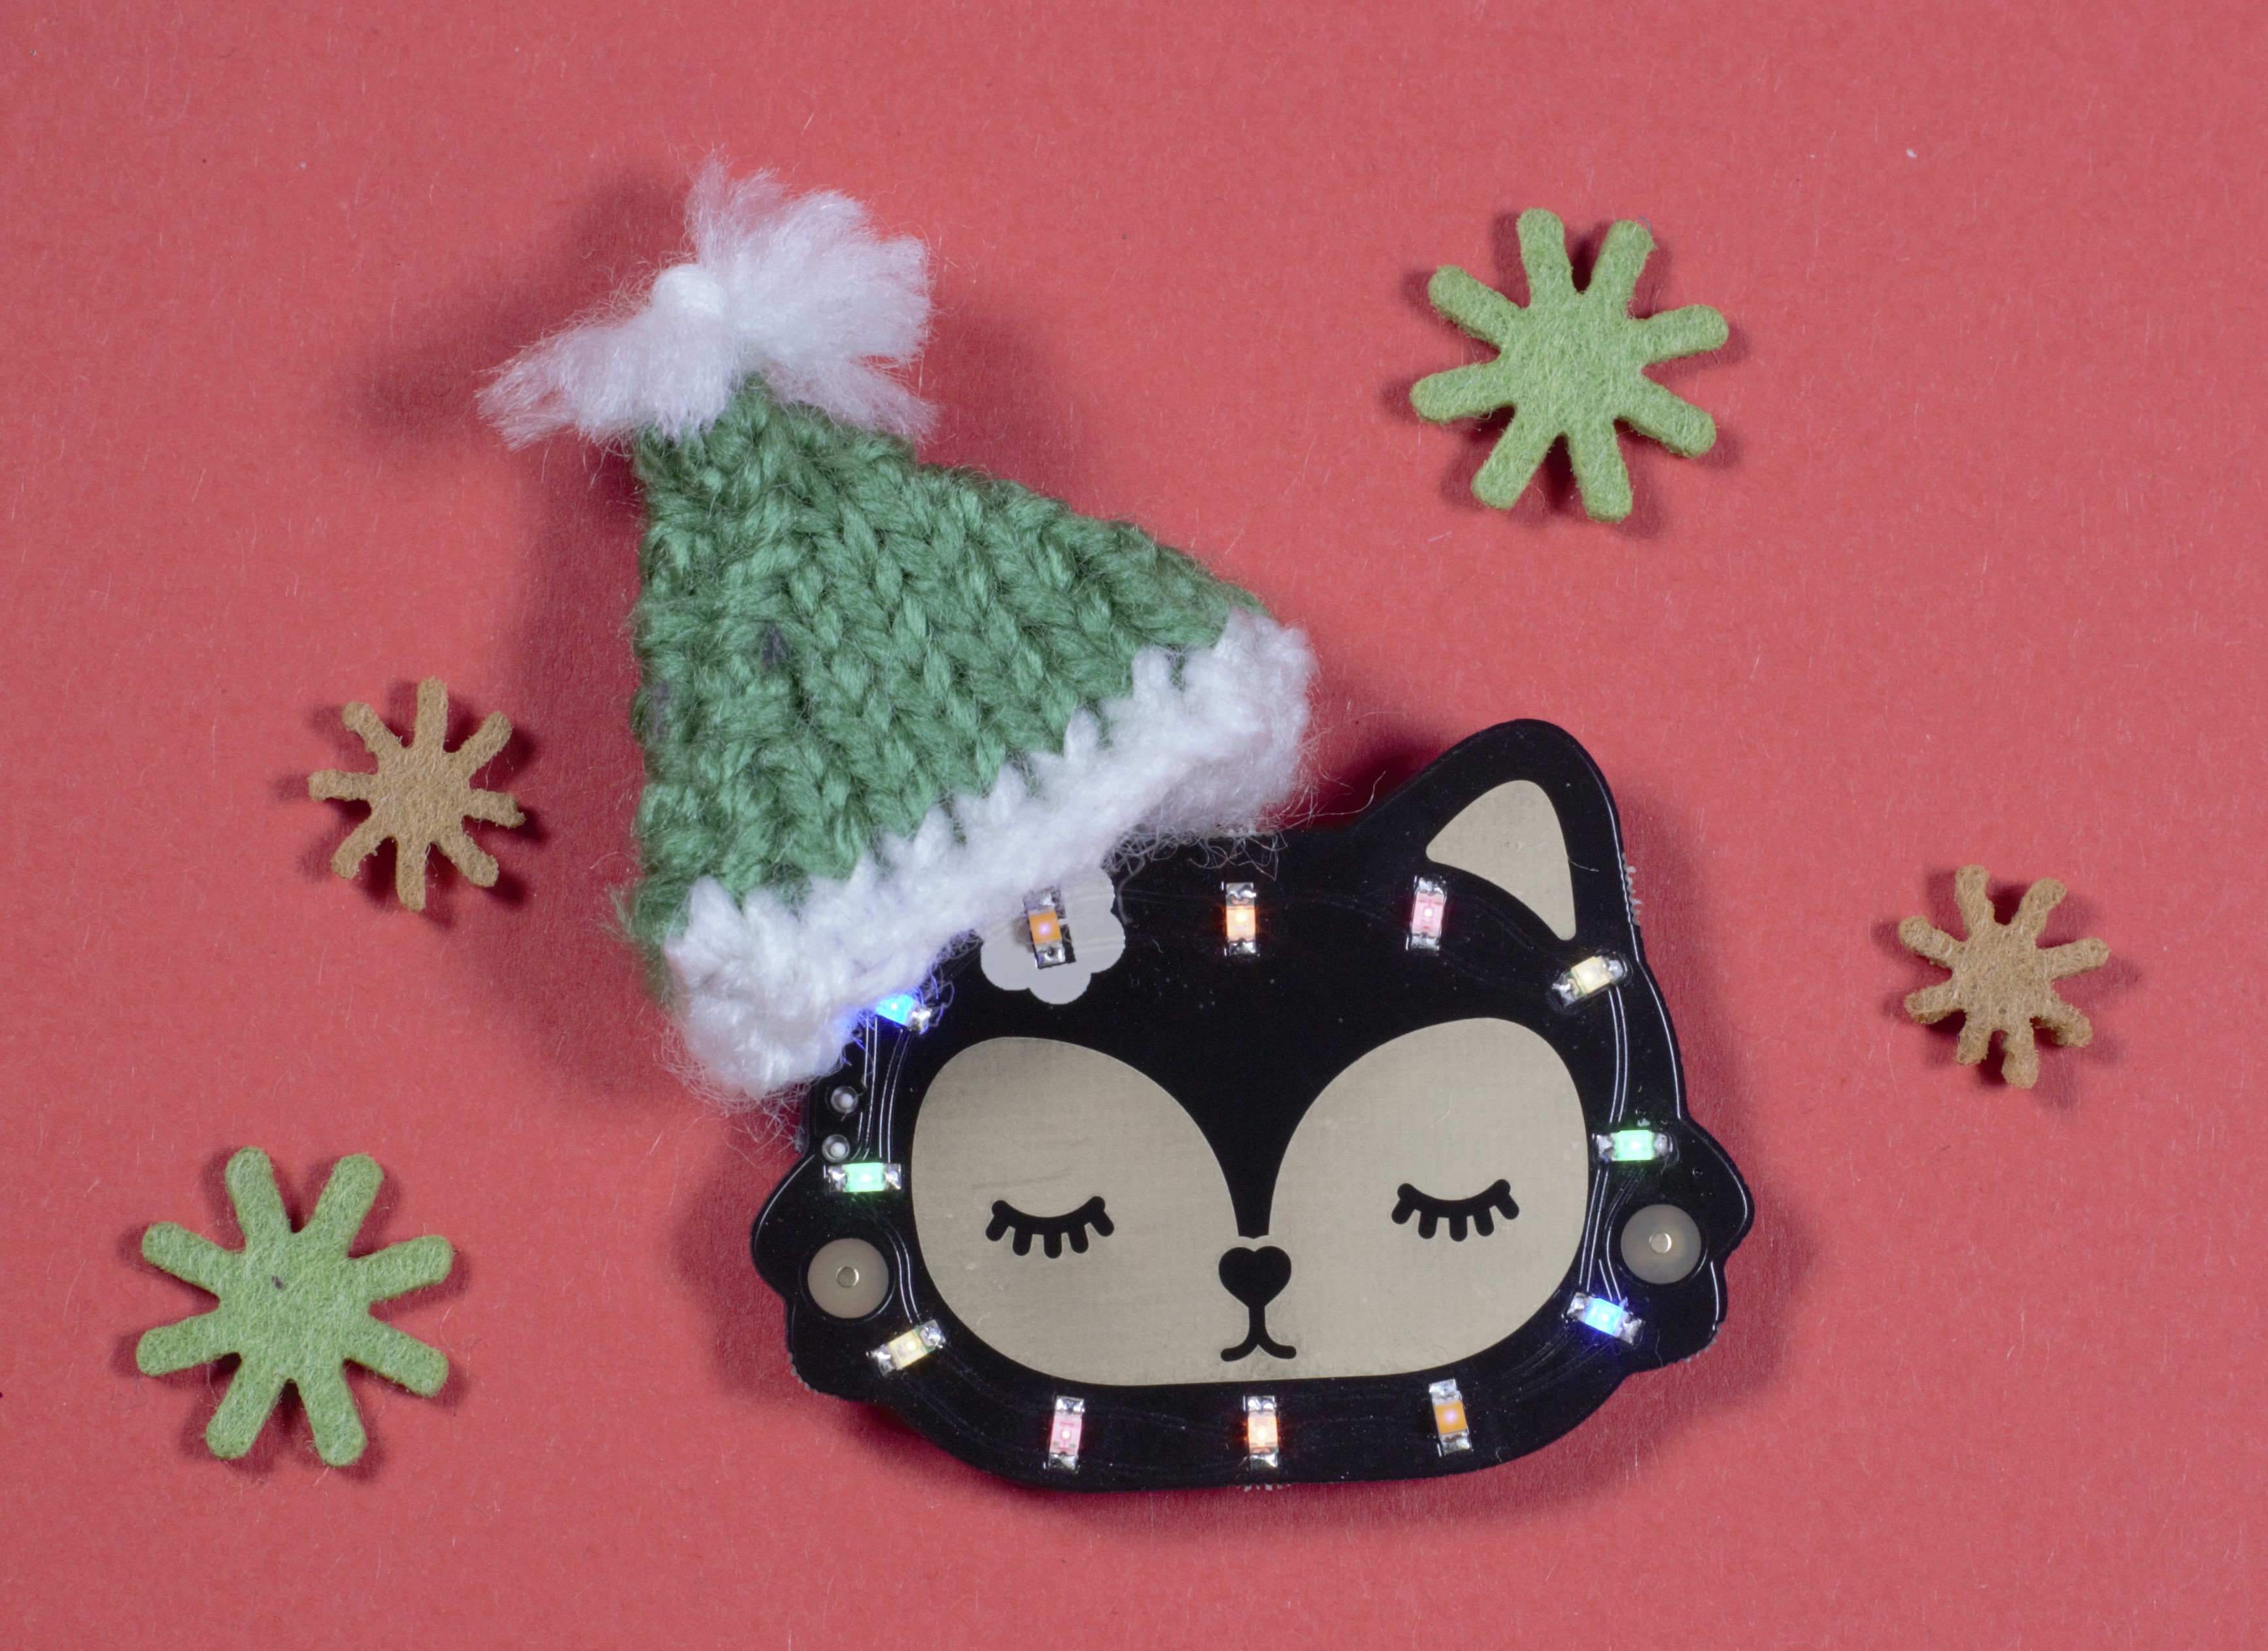
Teeny Tiny Wooly Hat
You will need:
- 2.5mm needles
- DK Wool in White/Red or White/Green
- Wool Needle
Using 2.5mm needles cast on 8 stitches in white wool - this will be the band around the bottom of the hat.
Row 1: Knit (8sts)
Break Yarn
Row 2: Using contrast colour (Red or Green) join and purl to end (8 sts)
Row 3: Knit (8 sts)
Row 4: Purl (8 sts)
Row 5: K2tog, knit to end (7 sts)
Row 6: P2tog, purl to end (6 sts)
Rows 5 & 6 form pattern, continue in pattern till 2 stitches remain on needle
Row 11: K2tog (1 st)
Break Yarn, leave piece on needle, hanging by the single stitch, and make a second one.
You should now have two hat shaped pieces hanging off the needle by a stitch each.
With the wrong side of the hats facing each other, use white wool and k2tog, pull the strands of wool tight and create a knot.
You can use this knot as decoration if you wish.
Stitch the two sides together with the main colour, and weave in any loose ends.
Add a pompom, bow or decoration to top.
Voila, you have your own tiny hat!
Drawstring Gift Bag
You will need:
- 3mm Needles
- DK Wool in colour(s) of your choice
- Wool Needle
Using 3mm needles cast on 20 stitches.
Row 1: Knit
Row 2: Purl
These two rows form the pattern.
Continue in pattern until piece measures 18cm long (7 inches for imperial pirates).
Cast off.
Fold piece in half (the fold is the bottom of the bag).
Stitch up the sides to form the bag.
Take three pieces of yarn (around a metre/yard long…ish) and braid together.
Using a wool needle, starting from the front centre of the bag, weave the braided cord in and out roughly 1/3 down from the open edge. This will form the drawstring to close the bag.
Fill with treasure, tie the drawstring, and gift away to your favourite pirate.
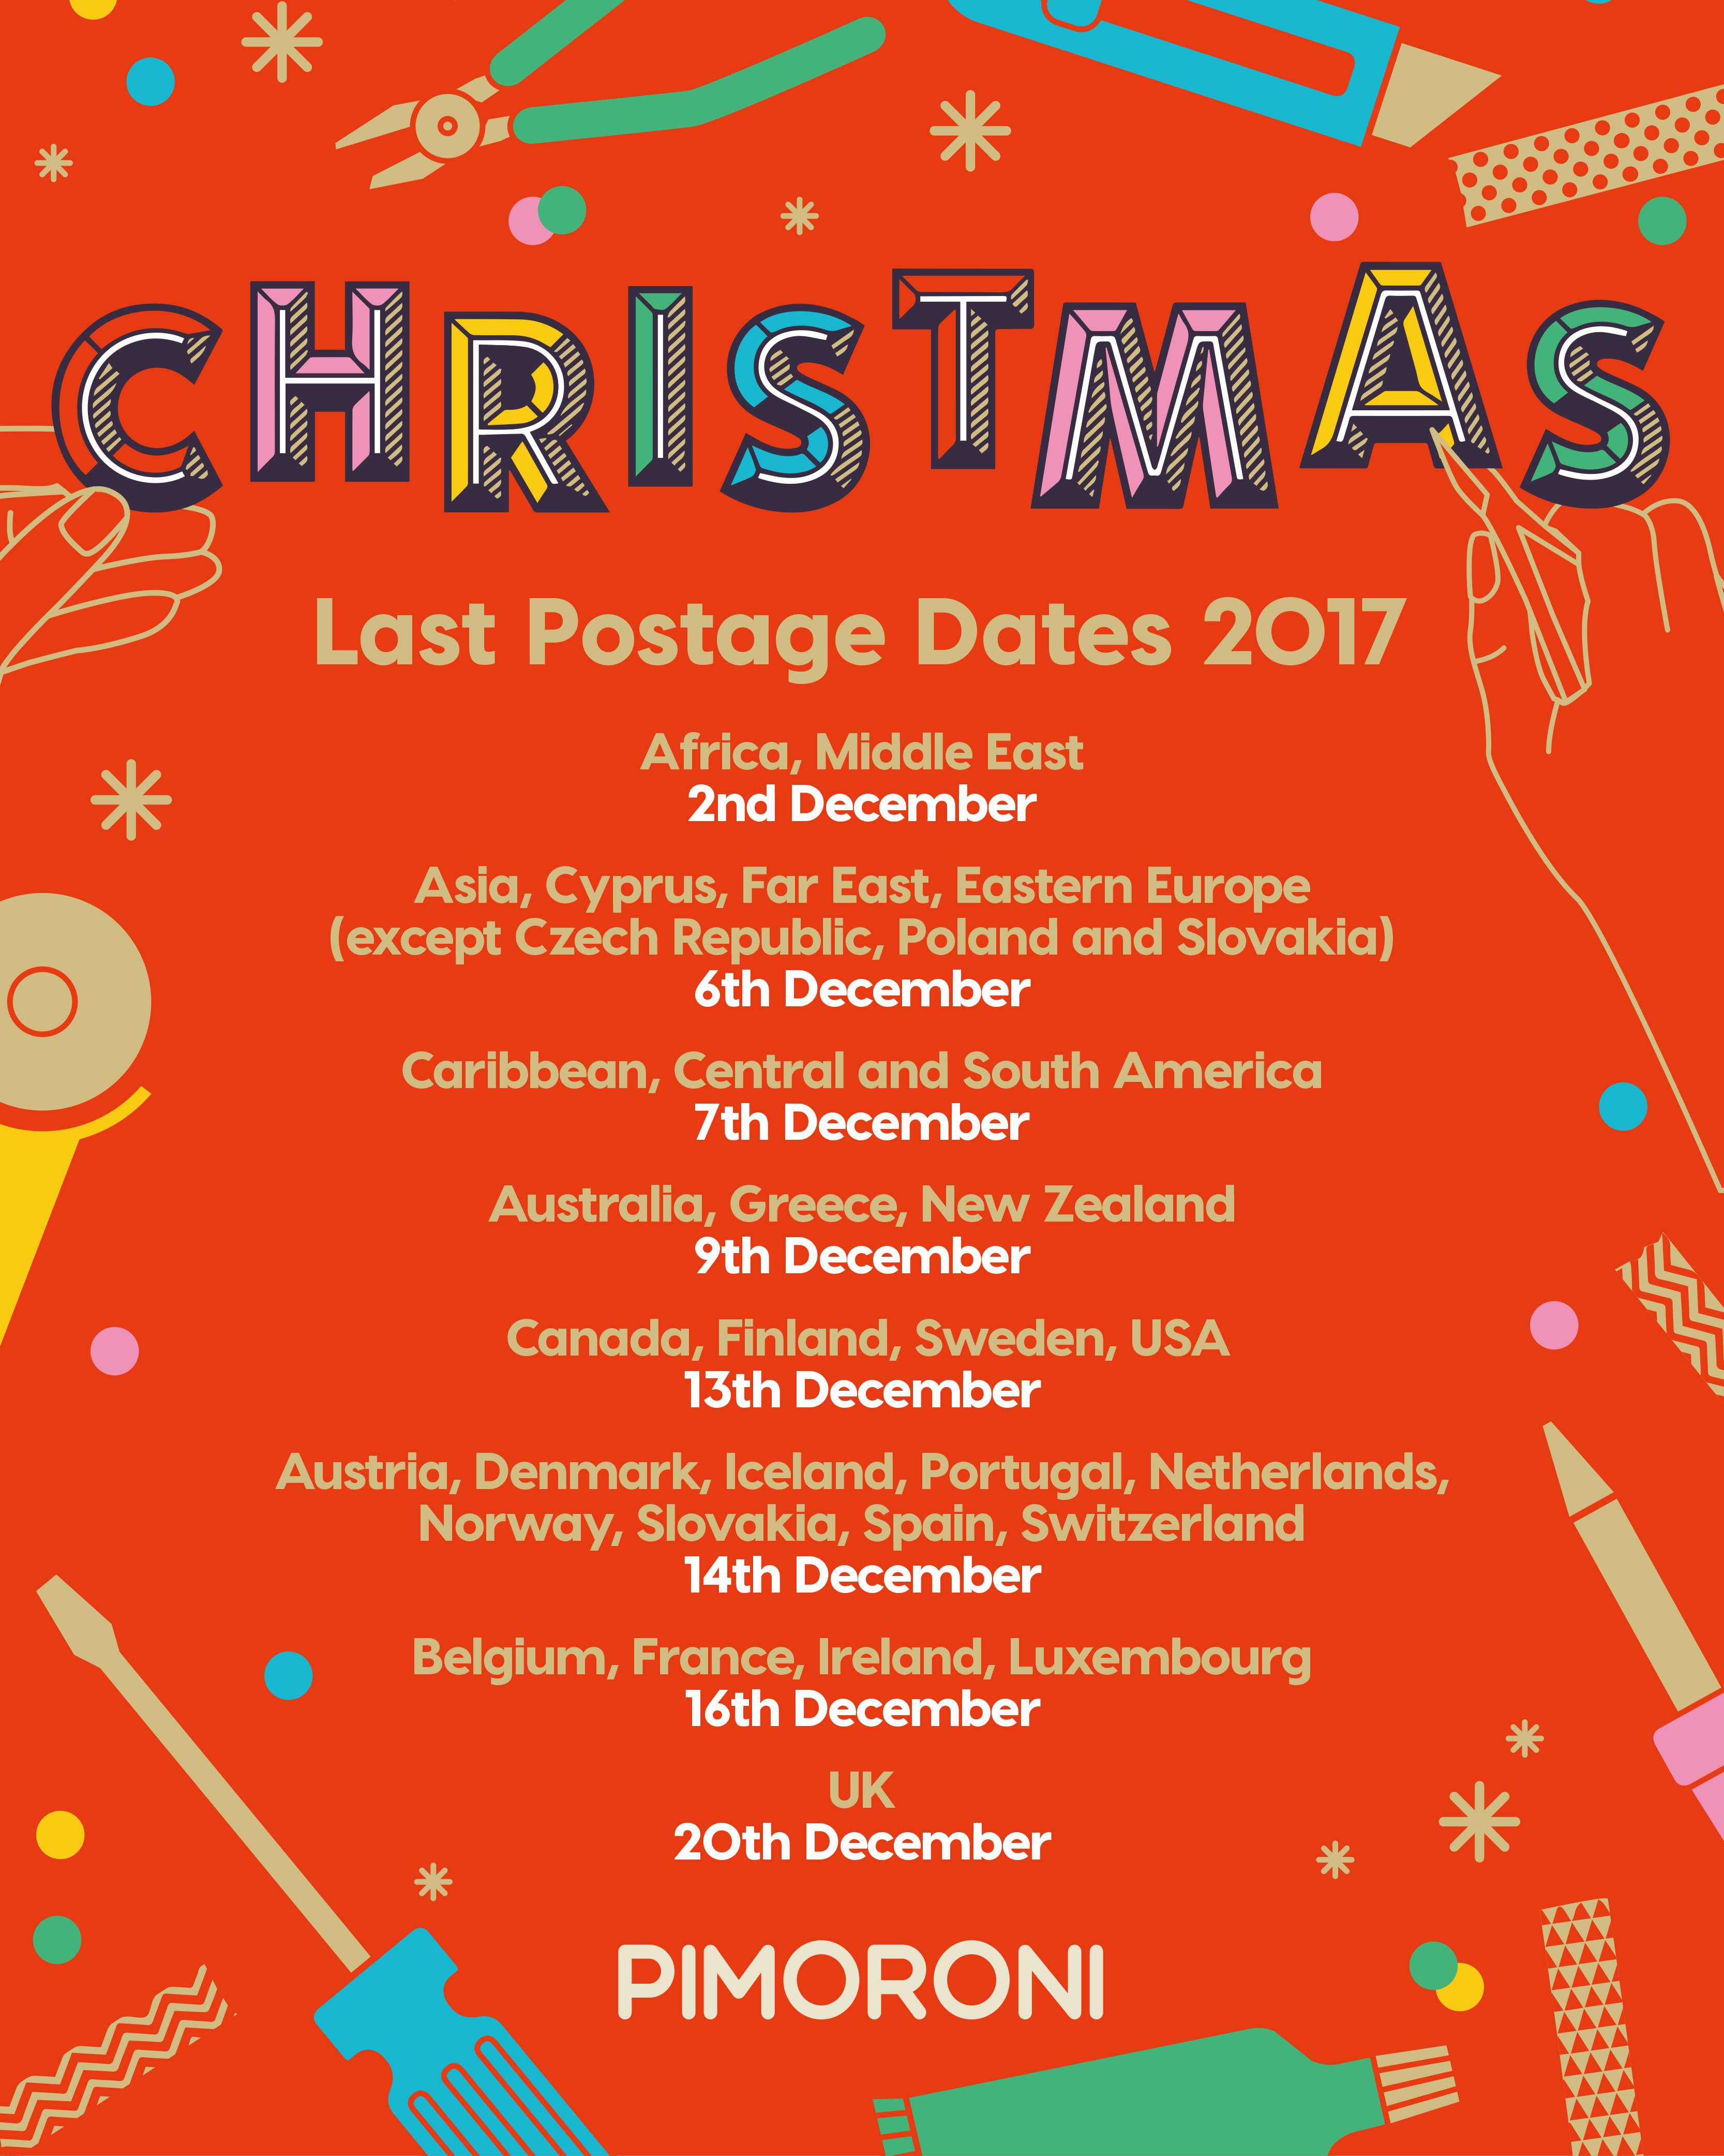
To help you with your present planning - here are the Royal Mail Postal dates from the UK to the rest of the world.
Also.... arbeitsfolge auf Deutsch (Bitte korrigieren Sie mich, wenn ich mich irre!)
Anleitung auf Deutsch: Der HutDu brauchst:
• 2.5mm Stricknadeln
• DK Wolle in Weiß/Rot oder Weiß/Grün
• Wollnadel
(zweimal gleich stricken) Mit 2.5mm Nadeln und weißer Wolle 8 Maschen anschlagen.
(Bündchen)
Reihe 1: Rechte Maschen (8 M)
Garn abschneiden.
R 2: Kontrastfarbe benutzen (Rot oder Grün) und linke Maschen bis zum Ende stricken (8 M)
R 3: Rechte Maschen (8 M)
R 4:
Linke Maschen (8 M)
R 5: Zwei Maschen rechts zusammenstricken, rechte Maschen bis zum
Ende (7 M)
R 6: Zwei Maschen links zusammenstricken, linke Maschen bis zum Ende (6 M)
R 5 und 6 zweimal wiederholen. (2 M)
R 11: Zwei Maschen rechts zusammenstricken (1 M)
Garn abschneiden, die verbliebene Masche auf eine Hilfsnadel nehmen.
Zweite Hälfte genauso stricken.
Die Hälften links auf links legen und die beiden verbliebenen Maschen rechts
zusammenstricken. Wollfäden anziehen und einen Knoten machen, der auch gut als
dekoratives Element verwendet werden kann (siehe Foto).
Beide Seiten mit der Hauptfarbe zusammenstricken und die losen Enden vernähen.
Einen Pompom, eine Schleife oder eine andere Dekoration an der Spitze hinzufügen.
Voilá: deine eigener winziger Hut!
Vielen dank an @meet_judith für die Strickanleitung!