We've recently had a new printed circuit board (PCB) assembly line installed - an integrated line with stencil machine, pick and place, and reflow oven - that substantially increases our output of PCBs.
The TL;DR is that the new line can place over three times the number of components per hour (12,500 versus 4,000), requires much less manual intervention, and produces fewer failures, so we can push out a much larger number of boards.
In case you didn't know, we design, assemble, brand, pack, and ship all of our own-brand PCBs right here in the Sheffield. The only step that we outsource is the production of the PCB panels themselves, as this is a bit of a nasty process!
Here's a video of the pick-and-place machine on the new line in action:
We'll go through the steps of PCB assembly process, what our previous process involved, what the new process involves, and show you a bunch of pretty videos and photos amongst it.
PCB assembly process
We'll sidestep the upstream (PCB design and prototyping) and downstream (testing) parts of the process and just focus on the assembly, which can be broken down into three main parts: stencilling, picking-and-placing, and reflow.
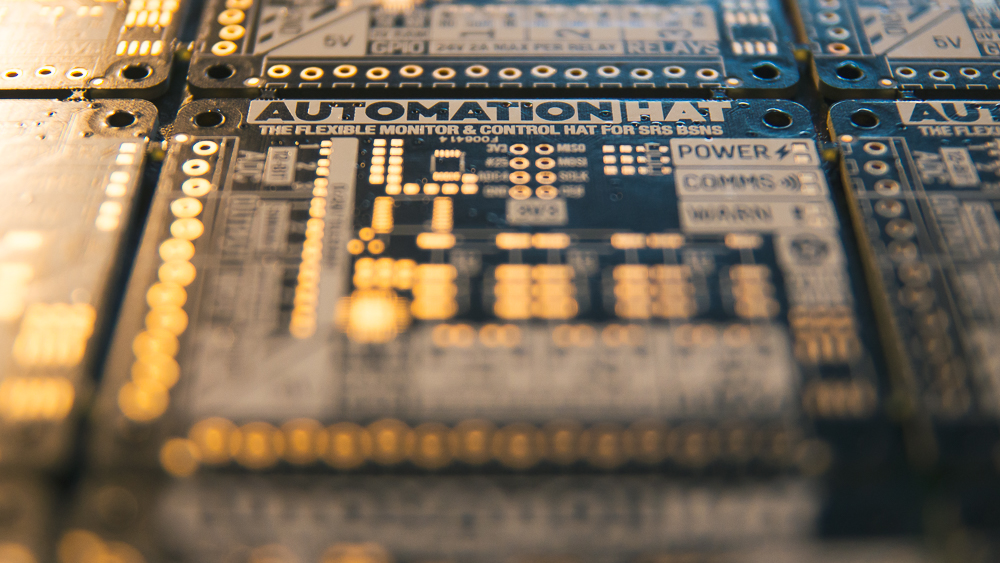
A majority of the components on our boards are SMD (surface-mounted device) as opposed to through-hole. The clue's in the name, but these components get soldered directly onto the surface of the board, rather than poking through a hole in the board and being soldered on the other side.
Each SMD component will have a landing - a series of two or more copper pads - that it needs to be soldered to. Inside the PCB itself, copper routes connect these pads to each other to form a complete circuit.
Each board comes from a larger panel that has multiple boards on it - 12 HATs or 21 pHATs - joined together by thin pieces called pips.
Stencilling
The stencil is a very thin (around 6 thousandths of an inch) piece of stainless steel with all of the landings on the panel cut out of it.
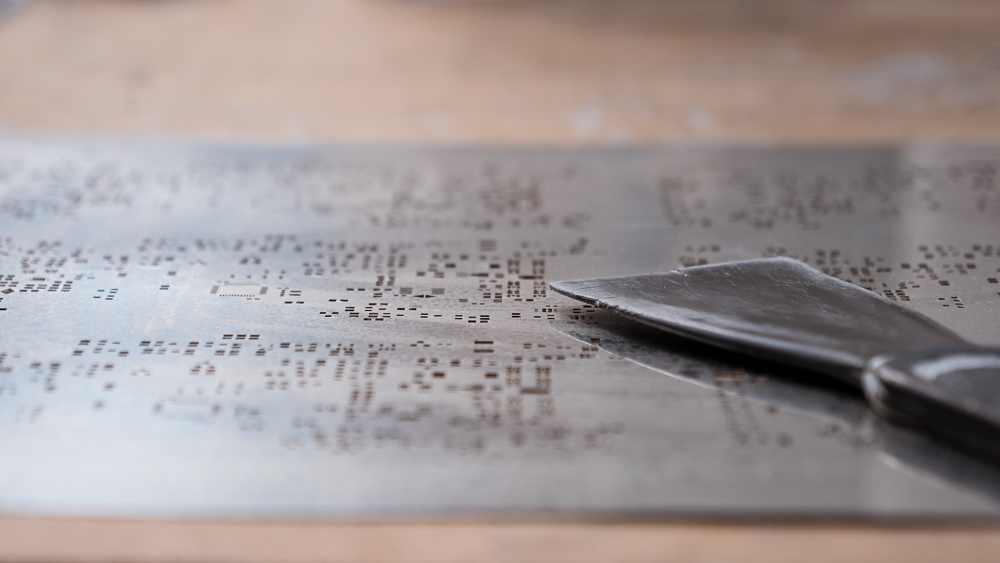
It works just the same as screen-printing a t-shirt - you place it on top of the panel, put some solder paste on top then squeeze it across the panel and through the holes onto the boards.
Solder paste is a mixture of tiny balls of solder suspended in flux. Flux is a thick, sticky substance that helps to stick the components (in the next part of the process) and also helps the solder to flow.
Once the solder paste is applied to all of the landings, the next step is to pick and place the components.
Picking-and-placing
A pick-and-place machine is basically a robot arm attached to a computer that picks components from big spools (the loader that they slot into is pictured below) and then sticks them onto the landings on the board panel.

The machine knows where to place all of the components because you load a board file - a file that has the locations and types of all of the components - onto the computer. In fact, it calculates the most efficient way to place all of the components too, so it's not just "place all of the component Xs onto each board" then "place all of the component Ys" and so on. To the human eye, this can look very random!
After picking and placing, all of the components will be stuck onto the right places on the boards, but they still need to be soldered.
Reflow
Reflow is the process of heating the boards up so that the solder paste melts and solders the components onto the boards.
A reflow oven is very much like one of those pizza ovens that you might have seen in your local pizza place! They have a conveyor belt that moves slowly through the oven from one end to the other.
The difference between a pizza oven and a reflow oven is that the reflow oven has a range of different temperatures through its length. The first stage heats the panel, bringing it up to temperature. Then its heated to a much higher temperature to melt and reflow the solder paste. Finally, its slowly cooled to allow the solder to set.
Our previous process
Previously, we had two Intelligent Drives iMP pick-and-place machines, that could place around 4,000 components per hour between them, although they required much more manual intervention.
These machines had a single fixed nozzle to pick and place components, meaning that they had to travel back and forth between the reels and the panel for every component. You'll see this in the videos below.
The PCB panels were manually stencilled, a process that took a fair amount of time and introduced opportunity for errors. Unlike our new line, the panels had to be loaded and unloaded one at a time from the pick-and-place machine, again costing time.
After each of these stages, the panels were visually inspected to ensure that i) the panel had been stencilled correctly, ii) the components had all been placed properly, and iii) the soldering was good.
So how does our new line differ?
Our new process
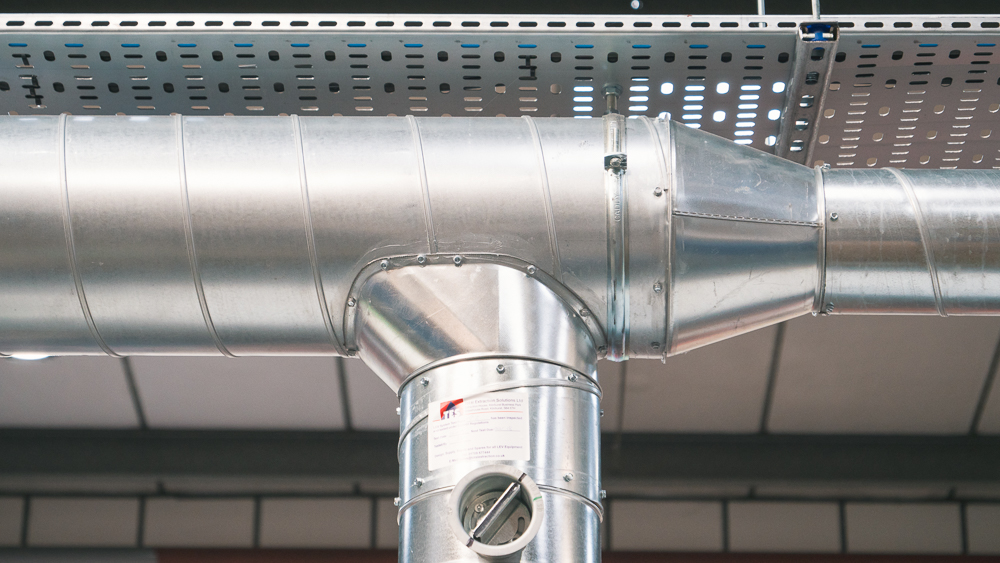
The new Europlacer line took a couple of weeks to install and set up, including the installation of a new mains power supply, and a suspended gantry to carry the wiring, air supply, and pretty substantial extraction (shown below).
The whole line is about 15 metres long and a couple of metres wide. The reflow oven is the largest machine on the line, in terms of length.
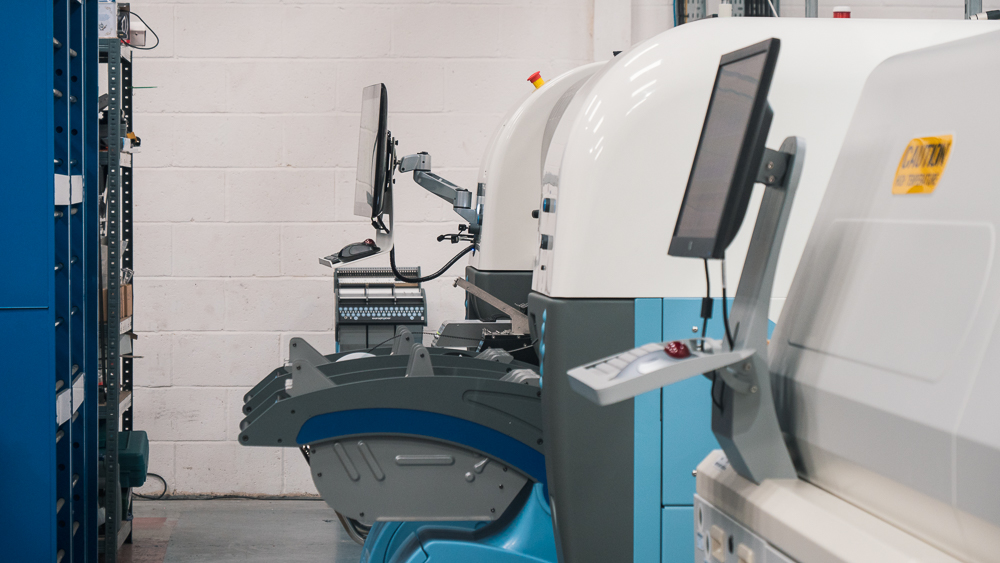
Whereas the old line required someone to move the panels between machines at each stage of the assembly process, the new line is completely integrated. At one end there is a rack that is loaded up with PCB panels and the panels progress one-by-one down the line into a rack at the other end where the fully-assembled panels stack up.
The stencil machine is accurate to within about 0.035mm, the approximate width of a very fine human hair! This means that there's no check required between stencilling the panel and picking-and-placing it. This accuracy means that we can (in theory) place 01005 components (although we don't use any components that small currently), that are just 0.4x0.2mm, about the size of a grain of sand!
The panels are fed along the line from one machine to the next by a conveyor that runs the full length of the line, just underneath the machines.
The only manual check required on the line is when the panels come out of the pick-and-place machine, before they're reflowed. We tend to inspect a random selection of boards with a magnifier, by eye, as they come out of the pick-and-place to ensure that they are as they should be.
So, in addition to the approximately 3-fold higher throughput in the pick-and-place, there's also the time saved by the automated parts of the new line, and a lower percentage of failed boards compared to our previous process.
To give you a feeling of just how much better our new process is, comparing this January (2018) to last January (2017), we produced roughly 2.5x as many boards (excluding failed boards) and had 1/4 the number of failed boards.