This blog post is mostly a little write-up of how we made the logo for our seventh birthday celebrations—an excuse to get crafty!
We'll freely admit to being a little bit bonkers, but all the best people are, right? You'll be in no doubt after reading this fairly long and somewhat rambling blog post...
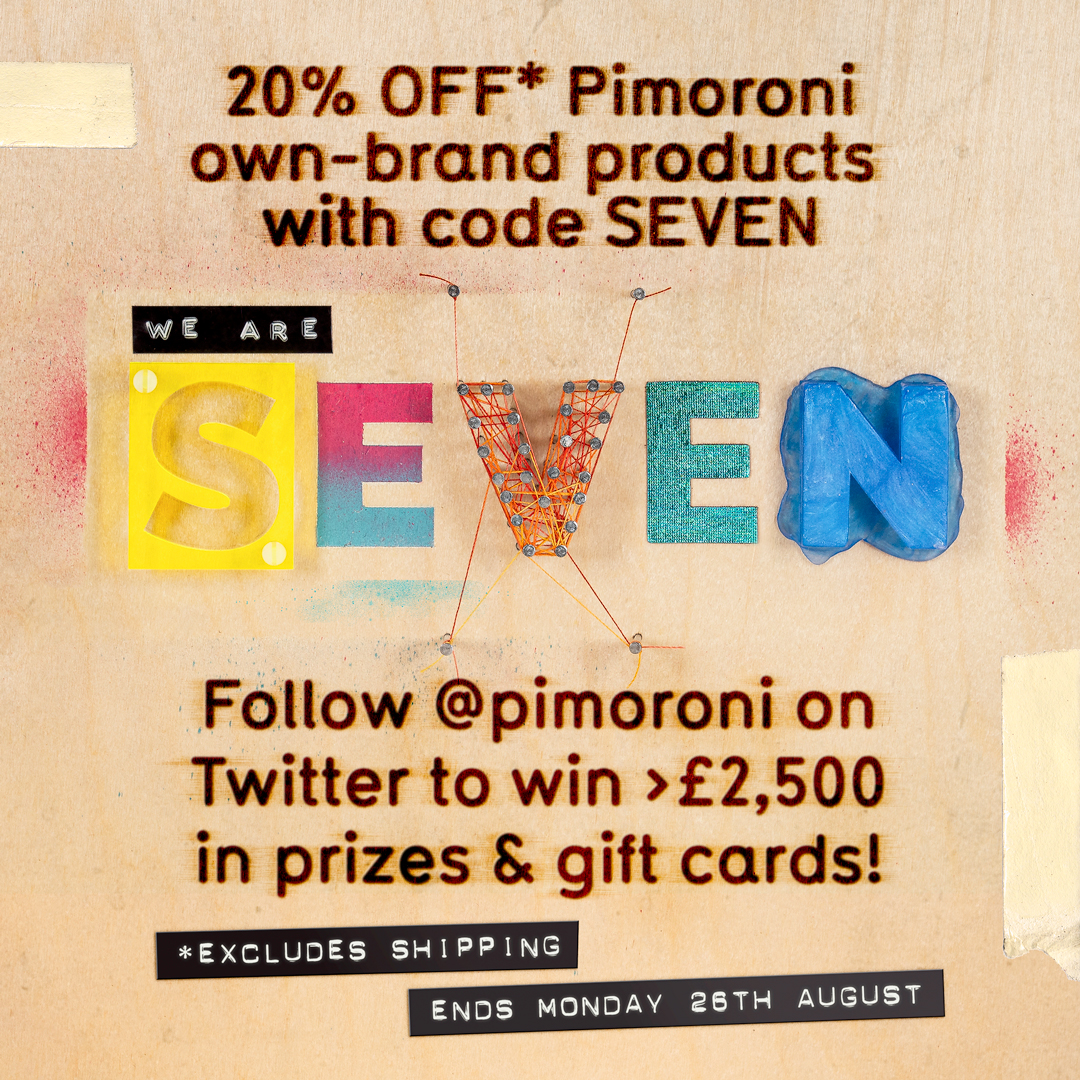
We're SEVEN!
In seven years, we've sailed quite a way. From what was pretty much a garage with a single laser cutter and a kettle, we've grown to span two different buildings, one for manufacturing with five laser cutters and a top-of-the-range PCB assembly line, and the other with our shop, mail room, and support crew.
We couldn't have done it without our amazing Pimoroni crew and, most of all, all of you wonderful, crazy lot! We always like to say thank you with some discounts and giveaways on our birthday...
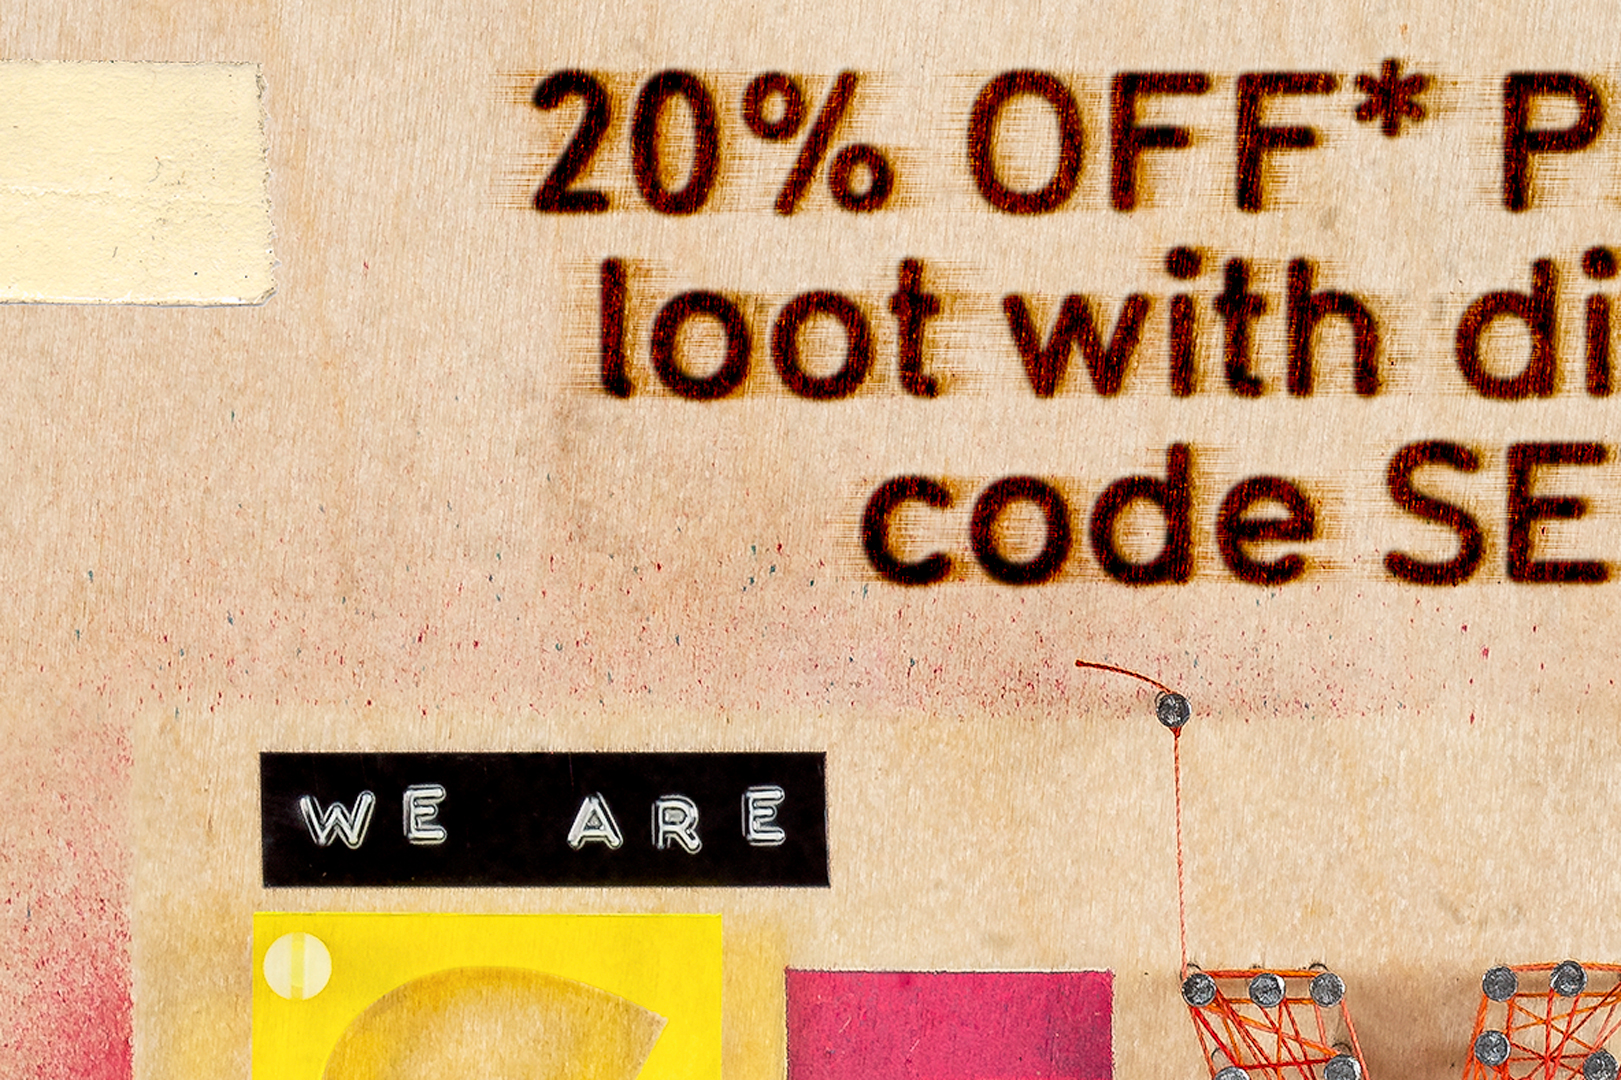
For a whole week—seven days—we've got 20% off our own-brand Pimoroni products (with code SEVEN, exc. shipping, ends 26th August), as well as seven (you can still enter today's, and then there's five more) amazing prize giveaways every day on Twitter. Follow us here on Twitter for all the details.
You probably know, but we love Making, so we made the logo type for our seventh birthday promotion out of real bits and bobs! Here's how we did it...
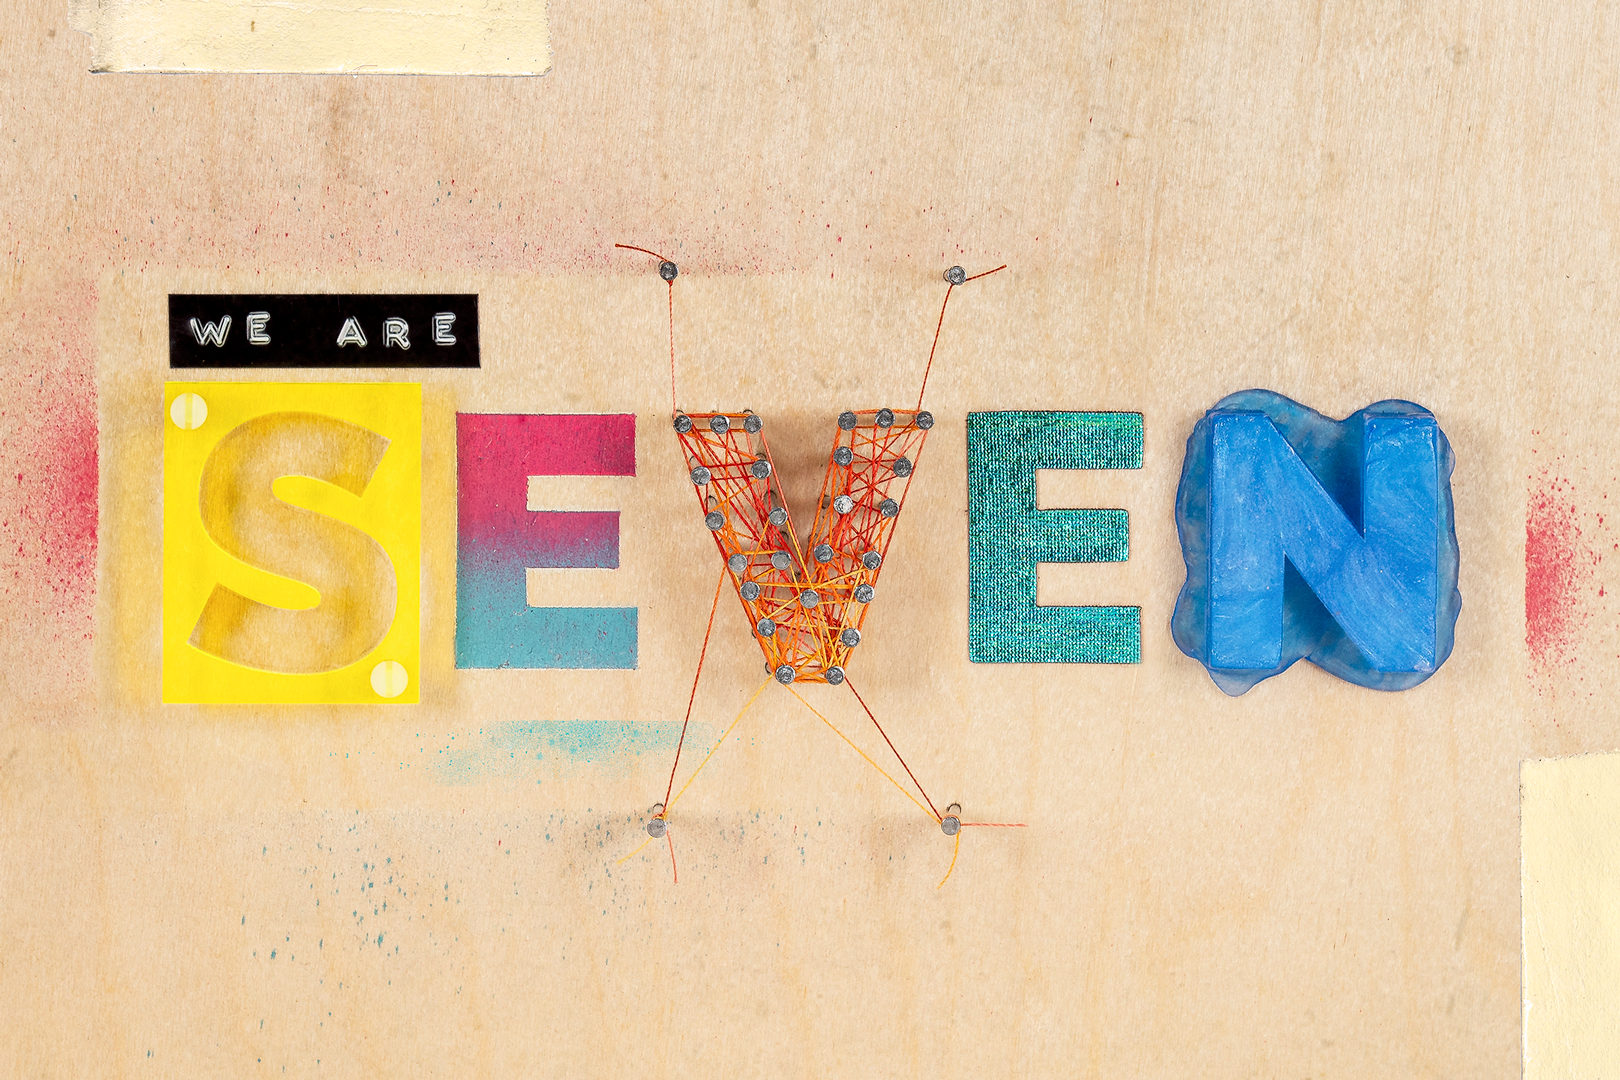
Crafty type!
The (obvious) theme of the promotion was "seven"—seven giveaways over seven days for our seventh birthday—so the logo would say "WE ARE SEVEN".
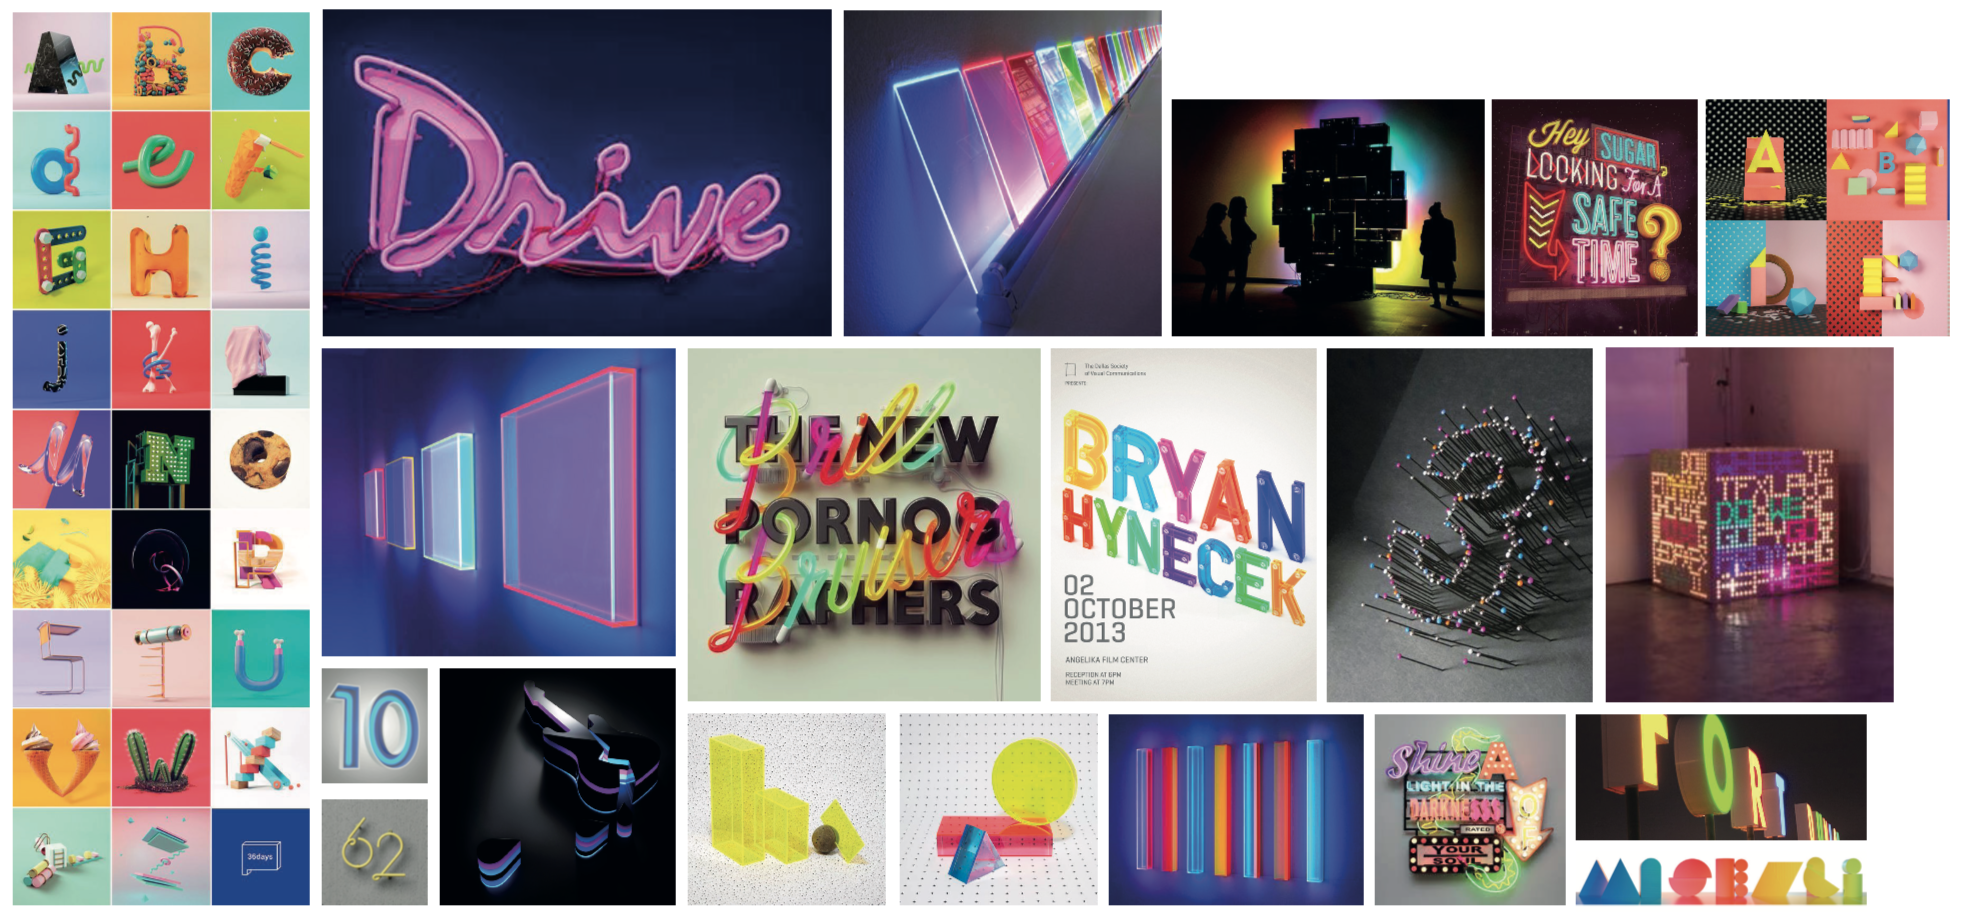
Lydia, our former Head of Creative, had the idea to make a birthday logo out of real stuff a couple of years ago, and put together a mood board with a bunch of colourful ideas and inspiration.
I thought I'd take the idea a step further and make each letter of the word "SEVEN" out of different materials, using tools and materials we had to hand and some other bits and bobs.
The (real) type would be on a piece of plywood, with a few extra Photoshop-ed bits of copy surrounding it, meaning that we could fit it to the various different uses we needed—website banner, email banners, etc.
#NAILEDIT
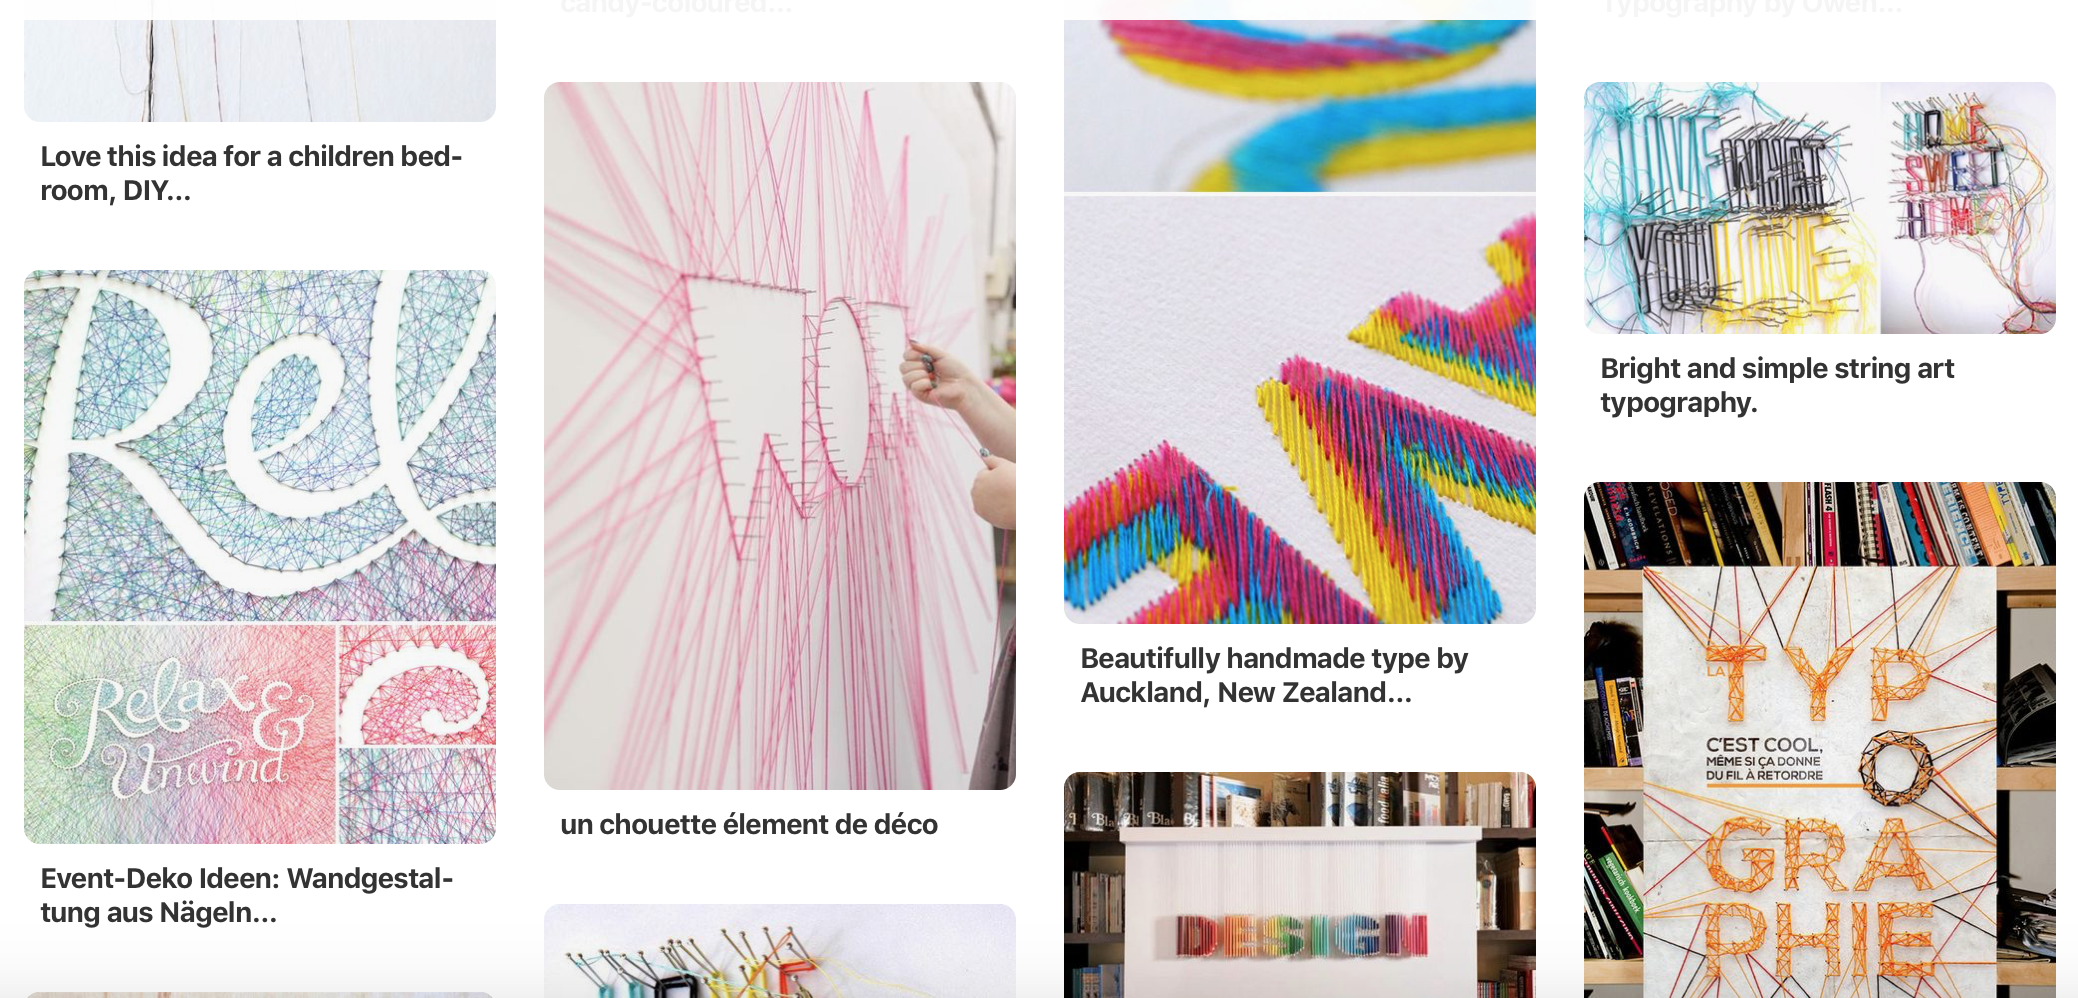
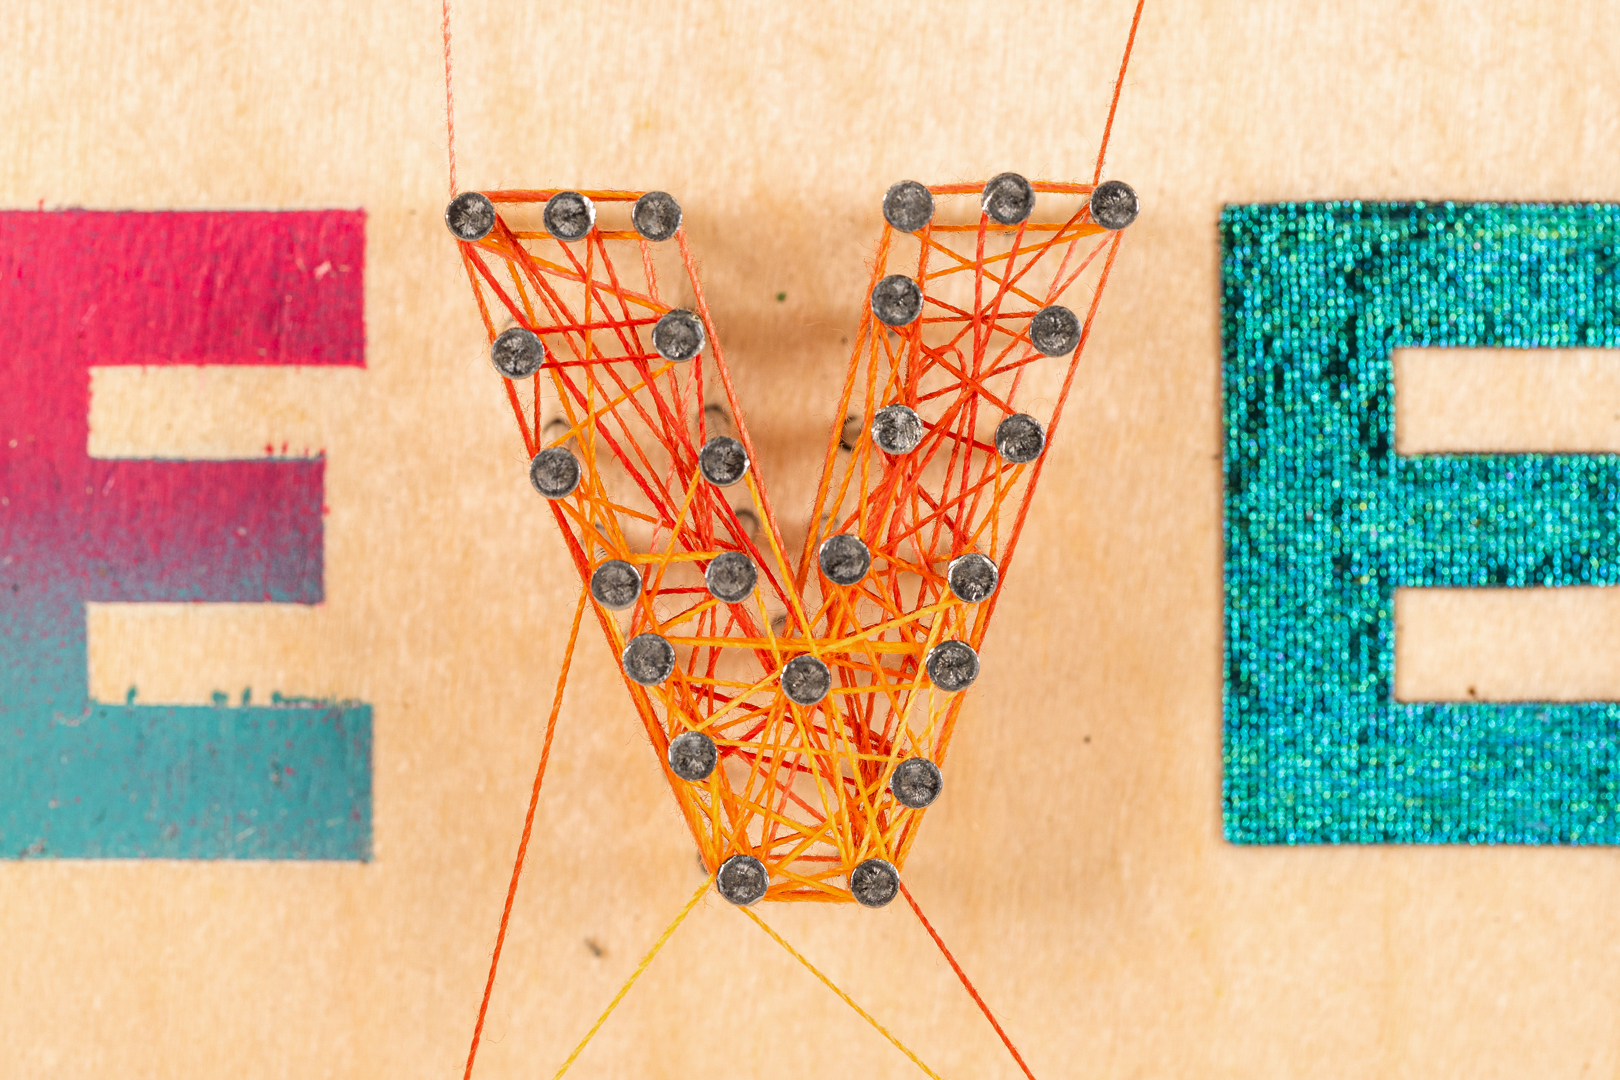
I knew that I wanted the central letter, the "V", to be made from thread wound round nails. I'd seen a few lovely examples of this on Pinterest and thought it would look pretty good. The others, I kind of made up as I went along... 😄
The materials that I didn't already have came from Fred Aldous, an amazing shop in Leeds and Manchester with all sorts of amazing craft and art materials. Seriously, you should go...
Spray paint and lasers
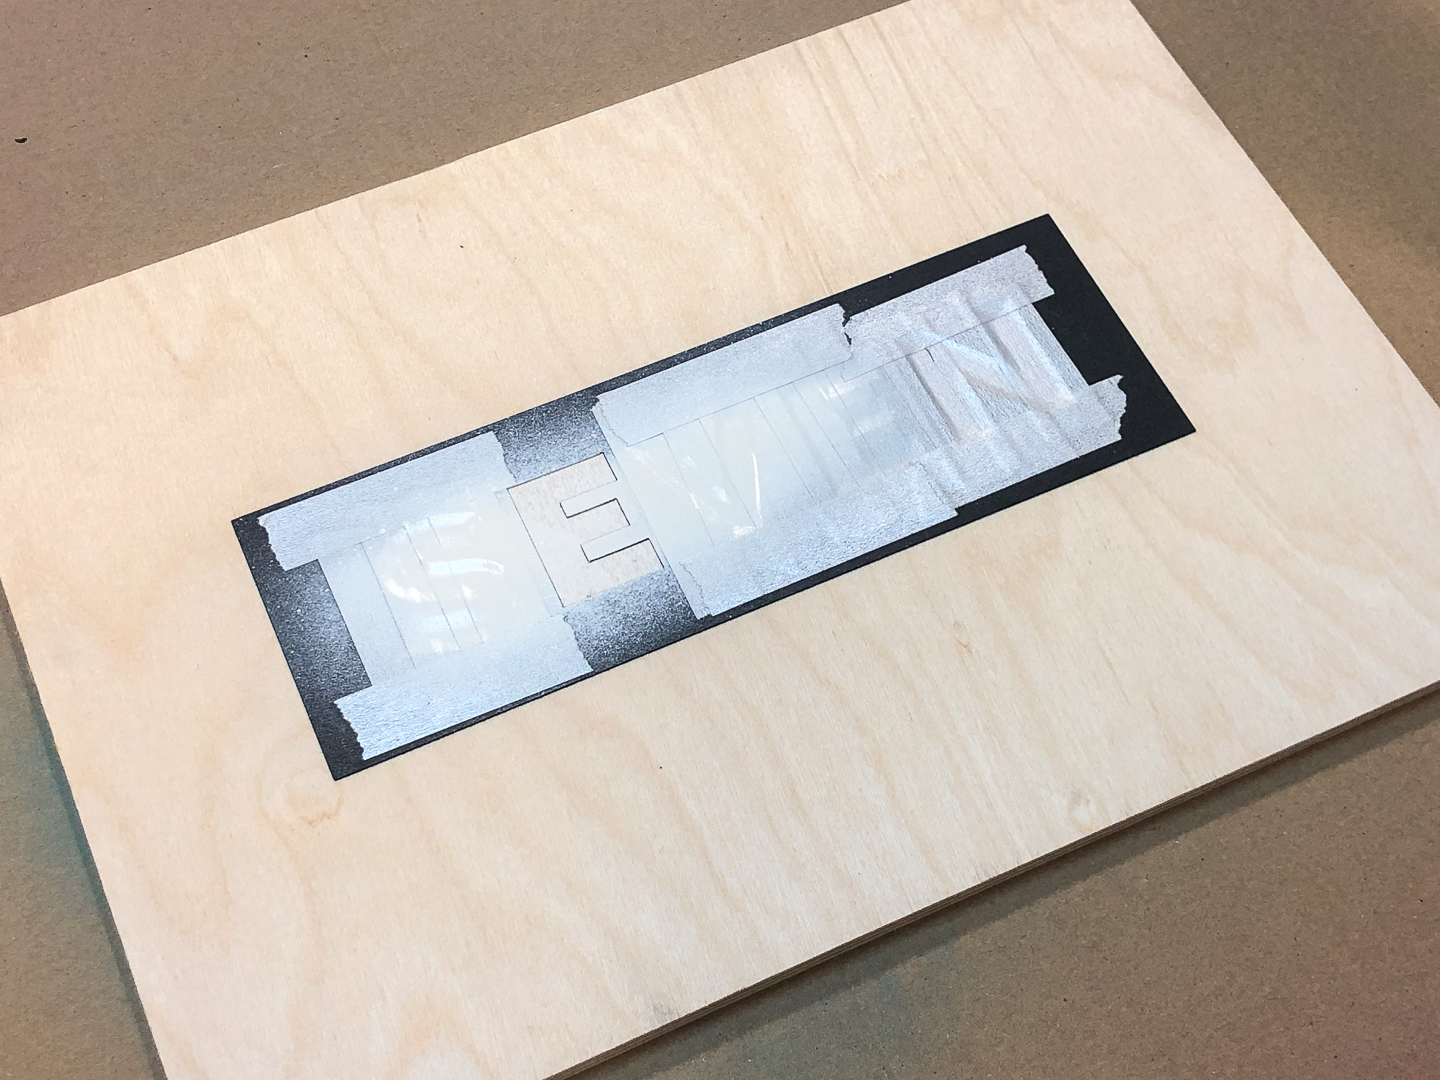
I laser-cut a template of the word "SEVEN" from black card in a sans serif font with nice straight lines (mostly), and then stuck it down with Spray Mount to the A4 sheet of birch plywood I was using.
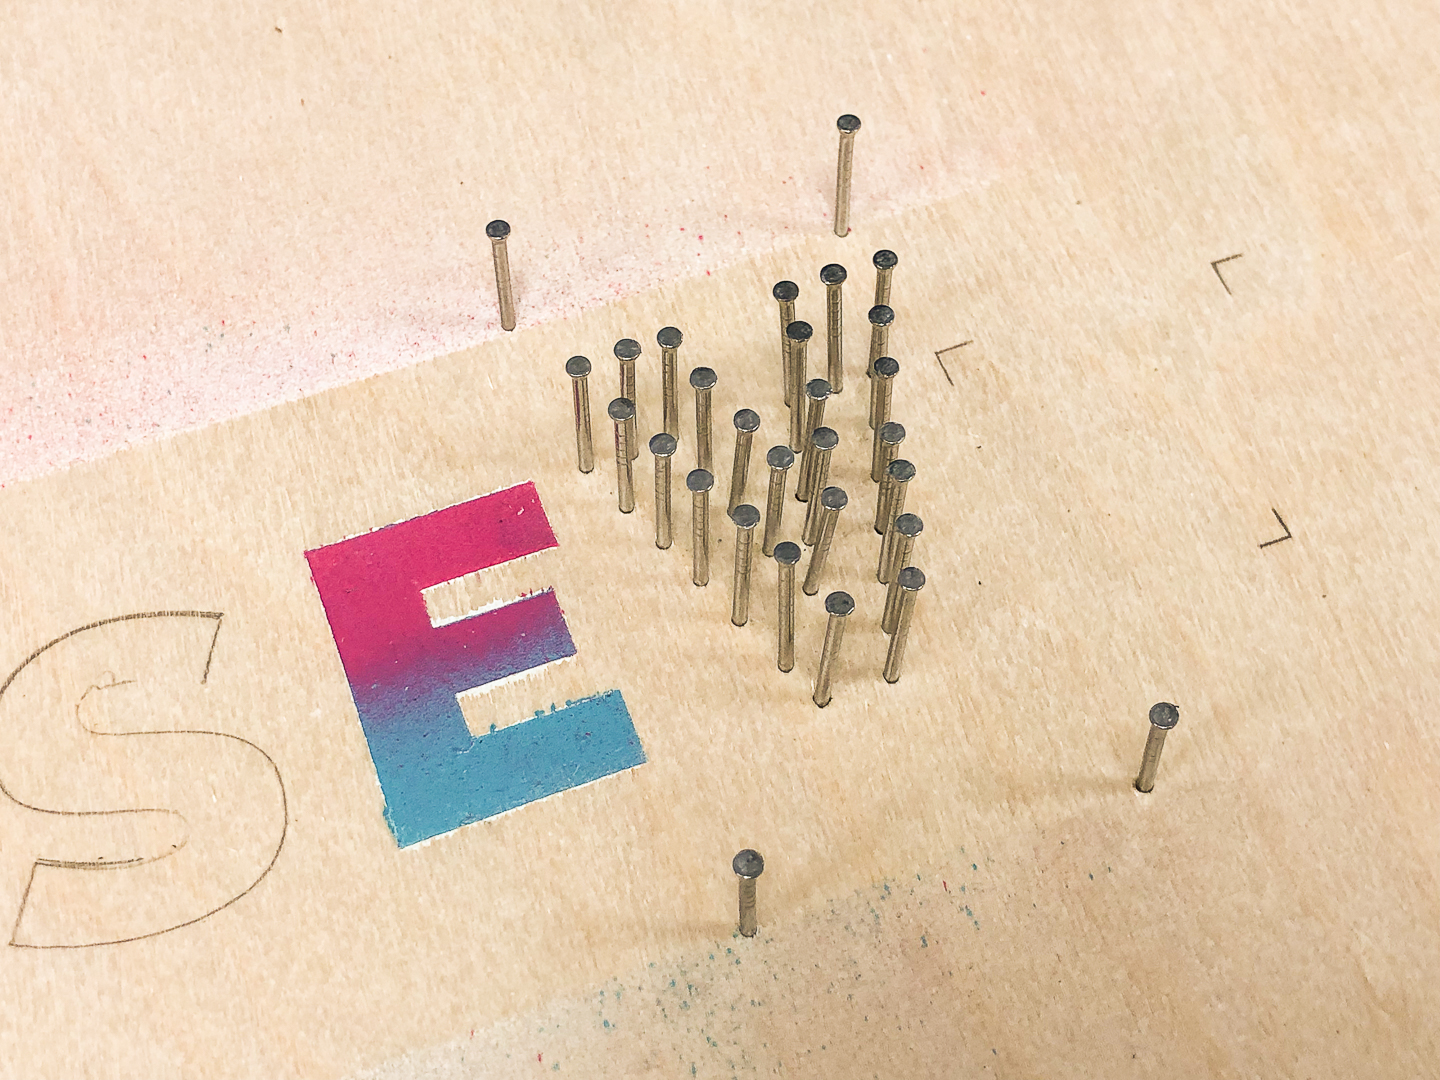
The first letter that I did was the first "E", in spray paint, since it would be hard to spray it later without messing the other letters up. I masked off the other letters (and learned that washi tape works really well for this sort of masking), then sprayed the "E" with some white paint first, to make the colours pop, then hot pink and greeny-blue Montana spray paint.
Still using the template to line everything up, I hammered some panel pins in, evenly-spaced, around the letter "V", then wound some really nice orange and yellow gradient-y Gütermann thread round the pins.
The "S" was laser-cut from some scrap toxic yellow Perspex and then mounted with a couple of nylon spacers and bolts. To make it a bit more interesting, I cut the letter out from a square; a negative-space kinda thing.
Spandex and weird Japanese moulding materials
The second "E" was also laser-cut, from some amazing blue-green (mermaid?) Spandex fabric that I had got to use as a photography backdrop. It laser-cut really nicely, and then I stuck it down with some PVA glue, using marks made with the template to align it.
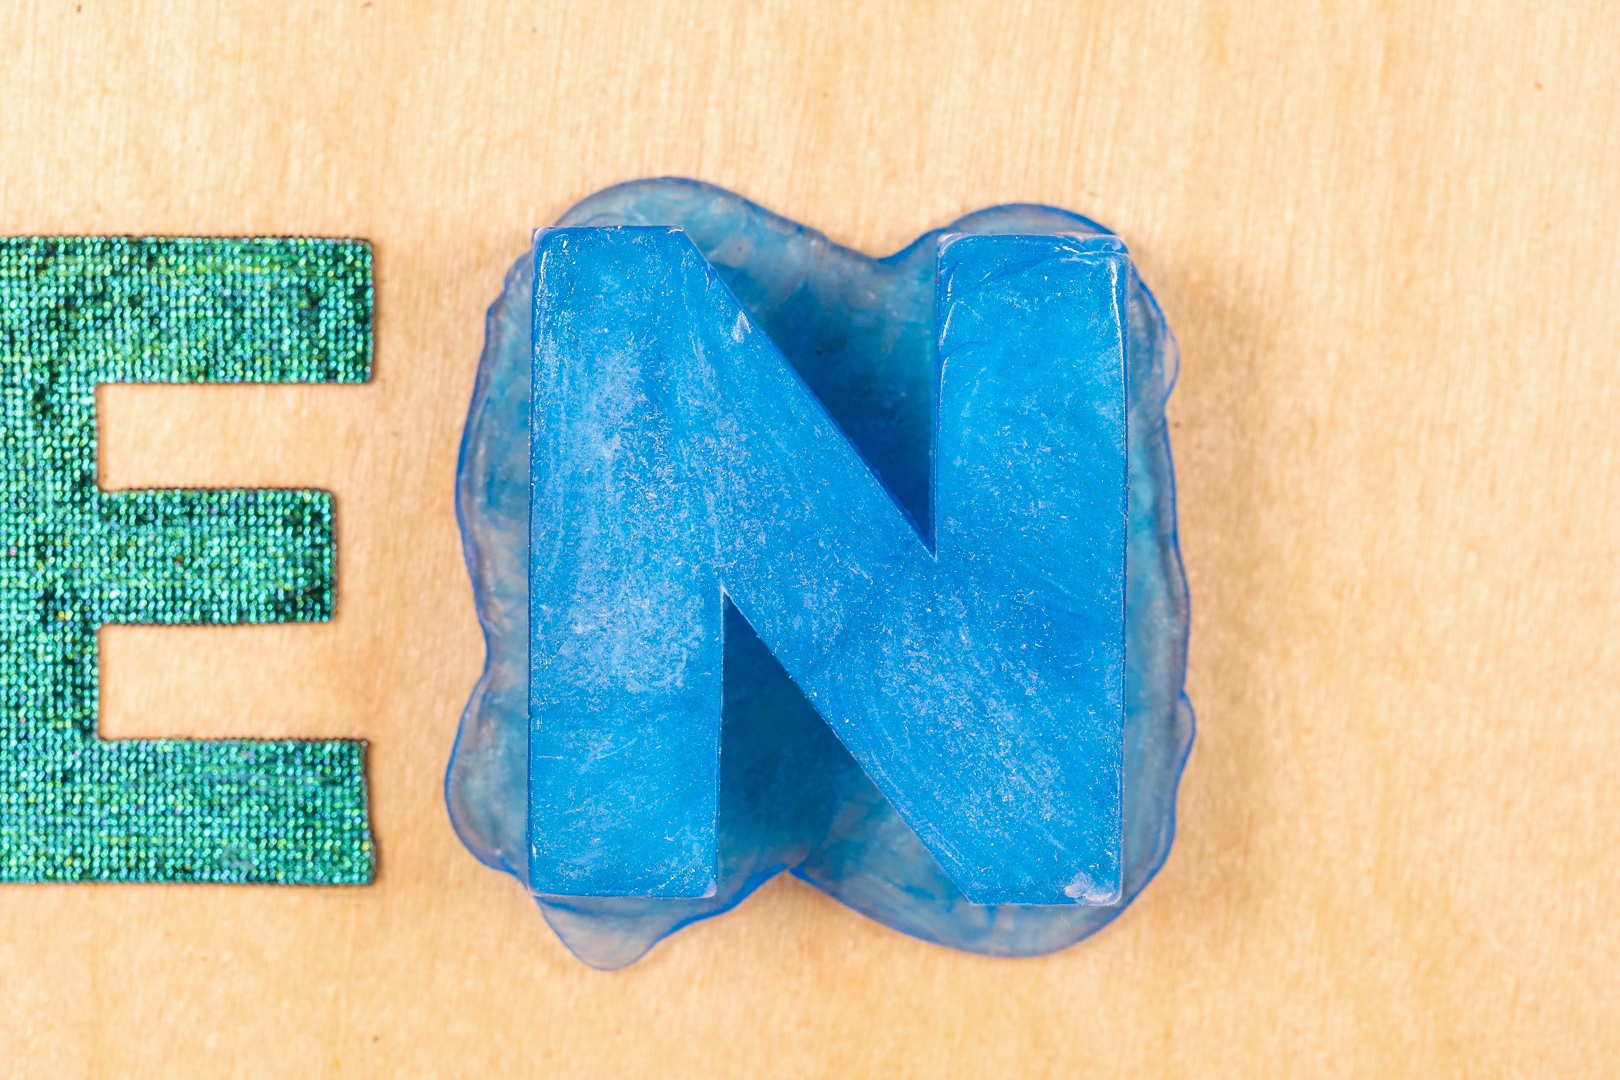
Maybe the most interesting letter was the "N". It kinda looks like it's melting, doesn't it? It's made from a weird Japanese moulding material called Oyumaru that's fairly cheap to buy and available in a bunch of colours.
You heat the Oyumaru up in hot water and it becomes flexible and mould-able and then it hardens up as it cools back down. It stays a little flexible once hardened.
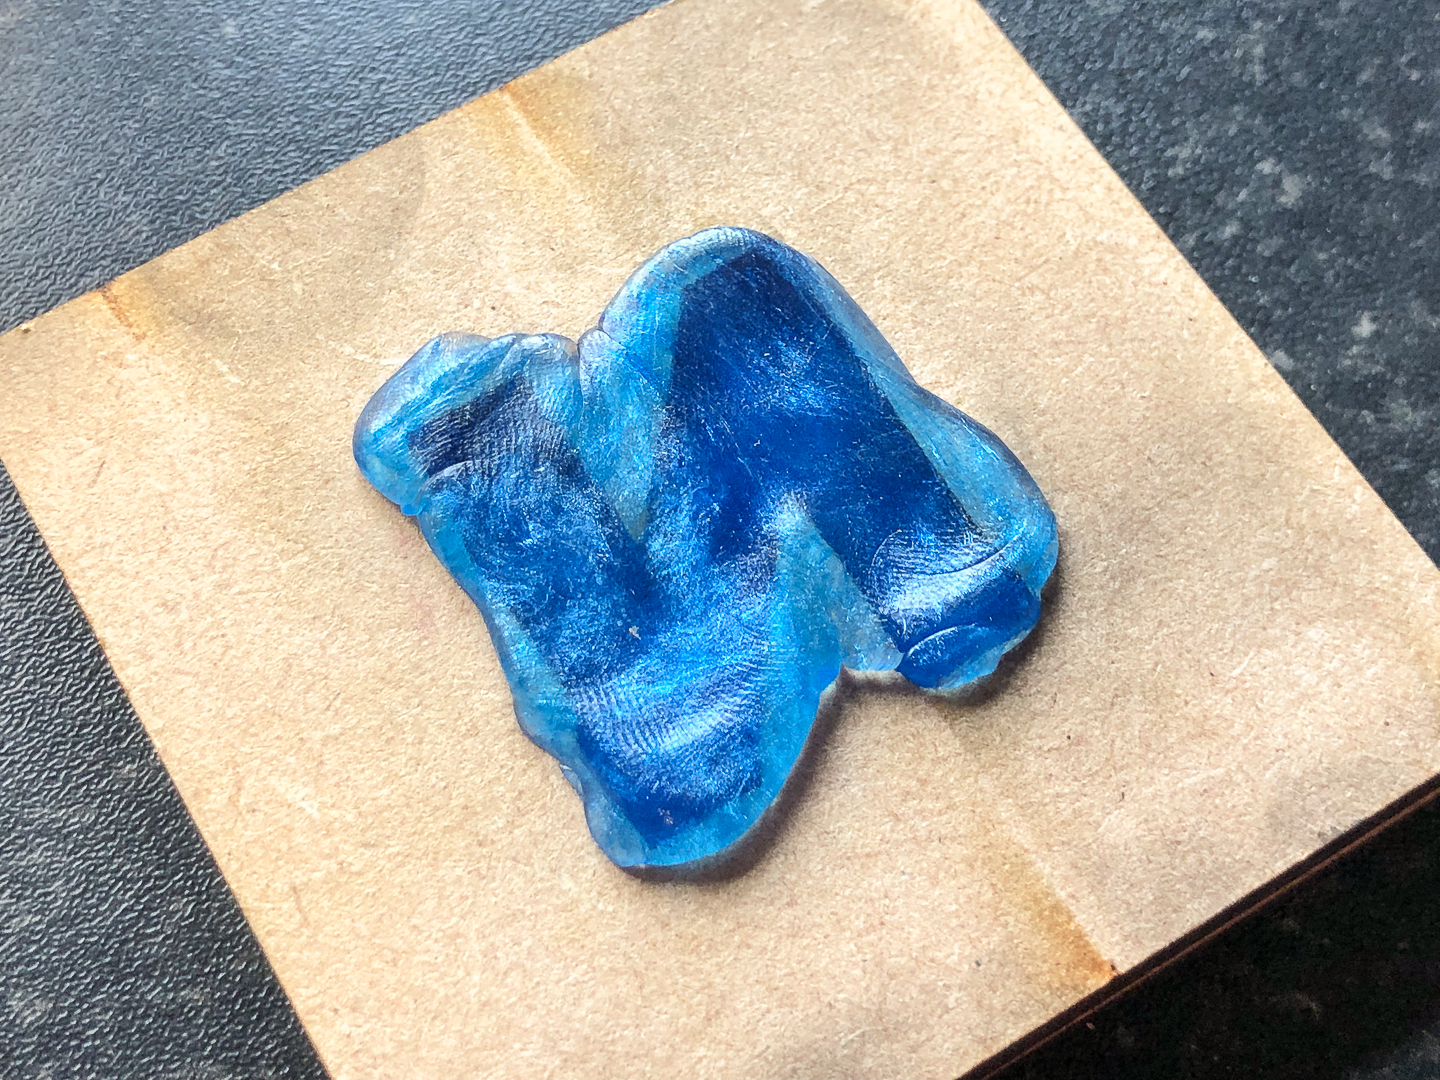
I laser-cut a mould in the shape of a back-to-front "N" from MDF, glued it together, then pressed in the soft Oyumaru, clamping it until it hardened. Rather than trim the wobbly edges (you can trim it nicely with a scalpel), I thought leaving it as-is gave it a cool, melty look. I stuck it down with Super Glue to the plywood.
Virtual laser-etching and Dymo tape!
The "WE ARE" text is printed on real Dymo label tape. The other bits on the various different banners are mocked-up in Photoshop to look as close as possible to the real bit, using the Dynamoe font.
I added some subtle little bits of grunge to the plywood background and extra bits of spray paint, again in Photoshop, along with some bits of masking tape.
Last of all, I faked a laser-etched text look with some blending mode tricks and layer effects. Using the colour burn blending mode with about a 50% fill on the layer gave a burnt-in text effect, and an emboss effect gave it some depth. A second copy of the text below with the wind effect and the colour burn blending mode again gave the effect of scorch marks round the text.
The final result
The final result is an authentically crafty looking image, combining what we love about Making with a splash of Pimoroni colour and a little laser-cutting sprinkled on top!
We hope you like it.